In this guide, we’ll walk you through the process for enabling and setting up run costs.
Run costs are used to give you an accurate reflection of how much each run costs to perform, once you’ve factored in the vehicle costs and any costs/charges against individual orders, to help you determine the profitability of your logistics operation.
Enabling run costs
In order to use Run Costs in Stream, it will first need to be enabled on your account by our Support team.
To enable Run Costs for your Stream account, please contact Stream Support.
Once Run Costs is enabled, you will then need to provide access for each of the relevant users within your account.
Enabling ‘Generate Run Costs’ for a user
Each user who will need to generate run costs, will need to have the ‘Costs & Charges’ setting enabled on their user profile.
To enable ‘Costs and Charges’ for a user:
- In the main menu, click ‘Users & Drivers’
- Double-click the user you wish to enable the setting for (or select the user and click ‘Edit’)
- Click the ‘Custom Settings’ button
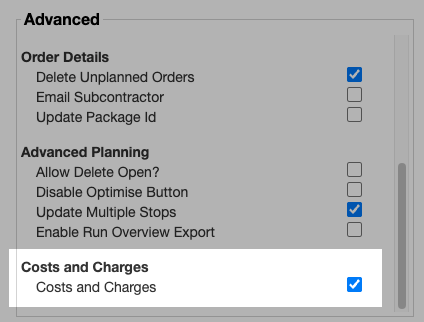
- In the ‘Advanced’ section, scroll down to the ‘Costs and Charges’ section and check the box to enable the feature for the selected user
Setting up vehicle costs
In order for Run Costs to work correctly, you must add the relevant vehicle costs to each of your vehicles.
Please note that only the fields on the Costs tab detailed below will be used in calculating the cost of the run.

All of these fields are optional and can be used according to how you calculate your operational costs. However, the more exact data you are able to provide in these fields, the better the reflection of your total run costs will be.
- Hourly Cost – A cost that is applied for every hour that the vehicle is being used on a run [VALUE x run duration].
- Fixed Cost – A single fixed cost that is applied once, each time the vehicle is used on a run.
- Distance Cost – A cost that is applied based on the distance covered on the run [VALUE x run mileage].
- Job Cost – A cost that is applied for each job (delivery/collection) on the run, calculated as [VALUE x no. drops].
These can also be added as defaults to a Vehicle Type so that they will automatically be used for any vehicle matching that Vehicle Type.
Adding default costs to a vehicle type
To add these costs as defaults for a vehicle type:
- In the main menu, click ‘Vehicle Types’
- Double-click the Vehicle Type (or select the Vehicle Type and click ‘Edit)
- Click the ‘Type Costs’ tab
- Enter the associated costs for this particular vehicle type
- Click ‘Save’
These costs will now be used by default for any new vehicle within this type, unless the costs are manually overridden at the individual vehicle level.
Adding costs to a single vehicle
To add costs to a single vehicle:
- In the main menu, click ‘Vehicle Details’
- Double-click the Vehicle (or select the Vehicle and click ‘Edit)
- Go to the ‘Costs’ tab
- Enter the associated costs for this specific vehicle
- Click ‘Save Vehicle’
Generating costs for multiple runs
To generate costs for multiple runs:
- On the Advanced Planning screen, click the ‘Search’ button to filter the list of runs to show only the runs you wish to generate costs for
- Click Actions > Generate Costs
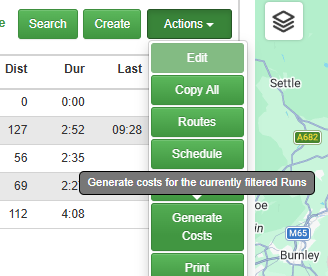
This will generate costs for each of the runs currently displayed in the runs list. You can hover over any of these runs to see a summary of the costs on each run.
Generating costs for a single run
To generate costs for an individual run:
- Select the run in the ‘Runs’ list
- In the ‘Selected Run’ section, click Actions > Costs
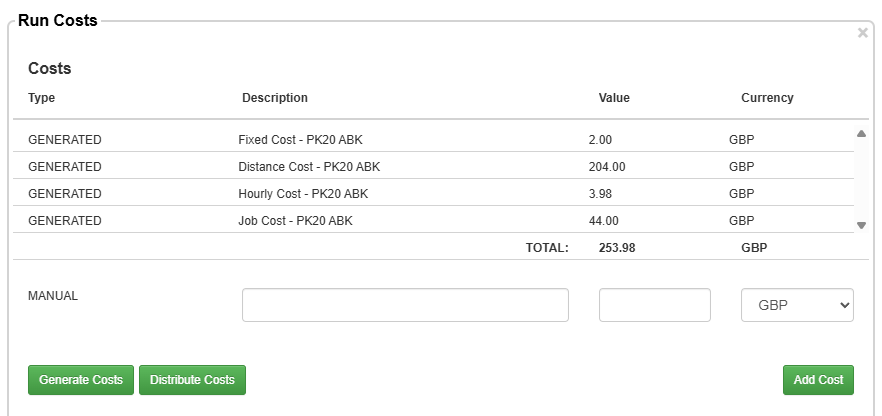
- Click ‘Generate Costs’. This will show a complete breakdown of the total costs, charges and overall margin for the run.
- Click ‘Save’
You can now hover over the run in the Runs list to see a summary of the costs for this run.
Adding manual costs to a run
Additional run costs can be added to the run manually.
These are not pulled from the cost information stored against the vehicle and can be done on the ‘Run Costs’ popup.
To add a manual cost to a run:
- Select the run in the ‘Runs’ list
- In the ‘Selected Run’ section, click Actions > Costs
- In the ‘Manual’ cost row, enter a description and a price

- Click ‘Add Cost’. The popup will now refresh and show the manual cost added to your run costs
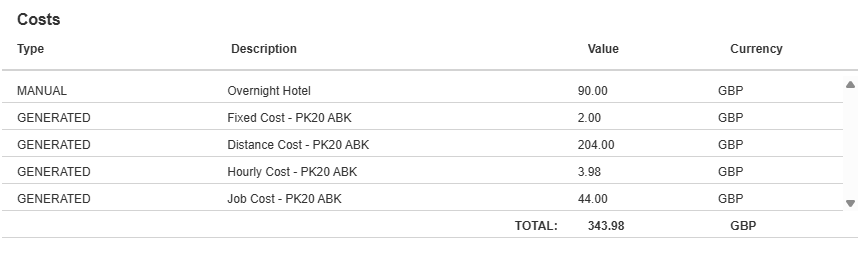
- Click ‘Save’
Distributing costs between customers
If you need to distribute your run costs between your customers, you can do this from the ‘Generate Costs’ popup.
- Select the run in the ‘Runs’ list
- In the ‘Selected Run’ section, click Actions > Costs
- Click ‘Distribute Costs’
- Use the dropdown to select whether the cost should be apportioned by:
- Orders
- Weight
- Cube
- Click ‘Apportion’. The costs will now be distributed between the customer orders based on the option you have chosen
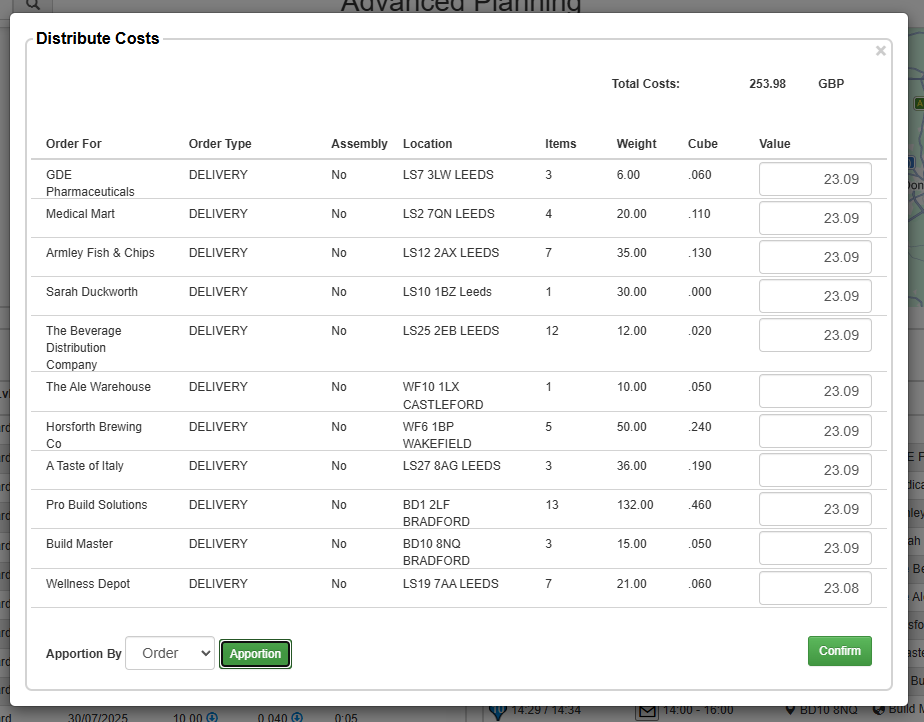
- Click ‘Confirm’
Enabling automatic run costing
Automatic run costing will automatically generate run costs once each day for all runs during an 8-day rolling window, starting the day before and ending 7 days into the future.
To enable automatic run costing:
- In the main menu, click ‘Settings’
- Click the ‘Planning’ tab
- Scroll the ‘Run Management’ section and enable ‘Automatic run costing’
Exporting run costs
You can export Run Costs as part of the ‘Run Summary’ report, which will include a column with the costs total and a column with the charges total for each run. To export the report:
- On the Advanced Planning screen, in the Runs list, click Actions > Export
- Select the ‘Run Summary’ report from the dropdown list
- Click Export