Label Types in Stream
In Stream, there are four different types of labels that you can print for your orders
Label 1
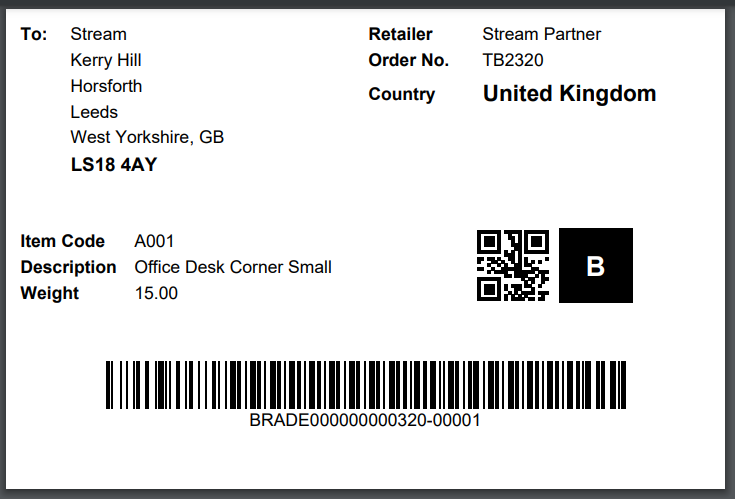
This label type is the default label type in Stream and includes: the delivery name and address, item details, retailer, order number and QR and barcodes for scanning.

Label 2
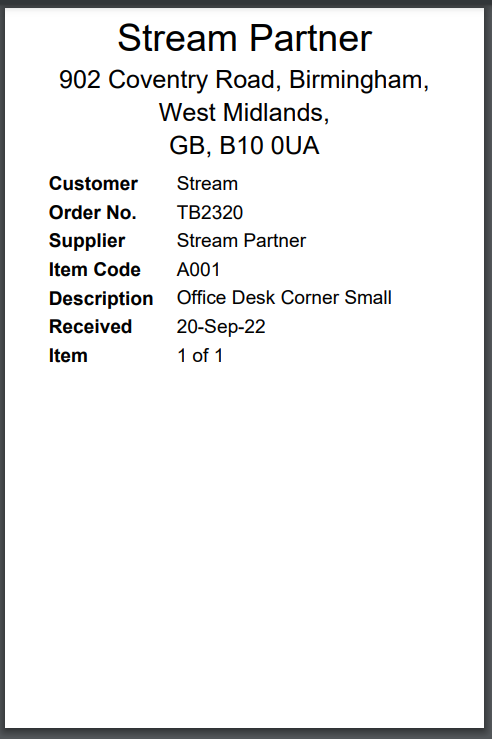
Label 2 is quite different in that it displays the Business Partner/Retailer name and address, rather than the delivery name and address. It includes the date the order was received and it does not include a barcode or a QR code for scanning.

Portrait Label
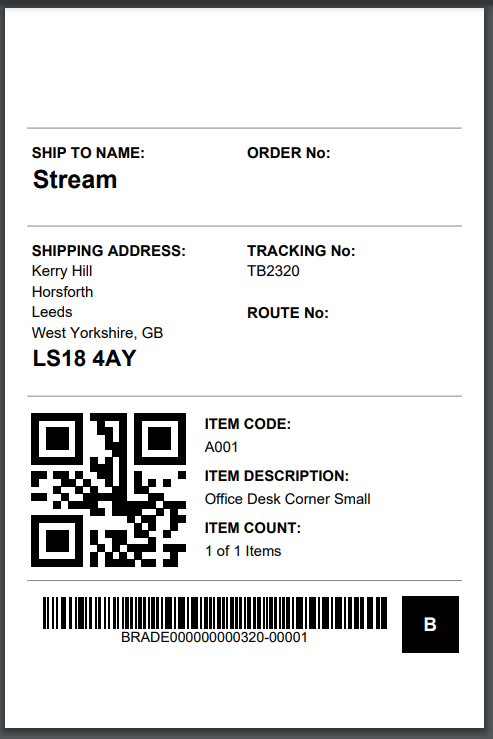
This label type is a slight variation to ‘Label 1’ and is displayed in a portrait format with the key differences being, tracking and route numbers included, displays number of items instead of item weight and no retailer name displayed.

Portrait Label (Large Postcode)
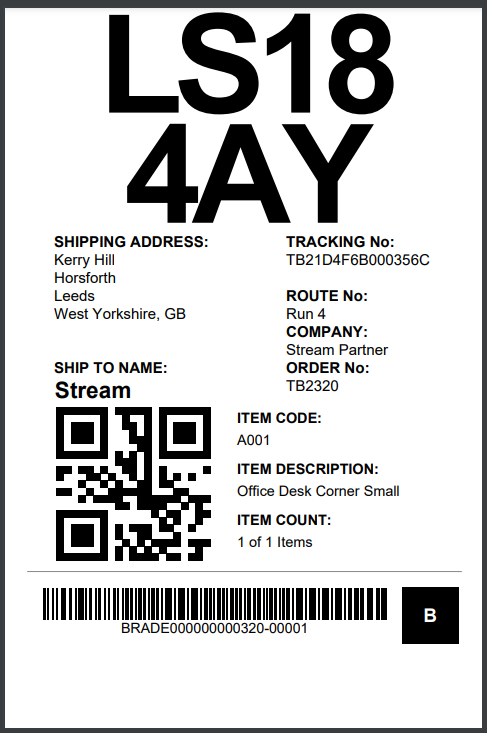
This label type is a slight variation to the Portrait Label and includes a much larger postcode for improved visibility

Changing Label Types
If you want to use one of the alternative labels for your orders in Stream, you can change this on the ‘Settings’ screen.
Please Note:
Labels are a system wide setting and so changing the label type will change it for all users who are printing labels across your organisation.
Step 1: Go to the ‘Labels’ settings
Click ‘menu’ in the top right hand corner of Stream and click ‘Settings’ on the drop down menu.
On the ‘Settings’ screen, click ‘Documents & Reporting’ in the left hand navigation.

Scroll down to the ‘Labels’ section on the ‘Documents & Reporting’ settings page.
Step 2: Change the label types
Under the ‘Labels’ heading, you will see an option to change the ‘Label Type’

Click the dropdown menu and select the ‘label type’ that’s most appropriate for your business.
Please Note:
If you hover over the information icon, next to the ‘Label Type’ field name, it will also show you examples of the different label types.
Step 3: Save your changes
Don’t forget to scroll to the bottom of the Settings screen and click ‘Save’, otherwise your changes won’t be applied!