Using the Vehicle Upload makes it faster and easier to create your vehicles in bulk in Stream.
This guide will walk you through the steps you need to take to import your vehicle details using the ‘Vehicle Upload’ feature.
How to Upload Vehicles in Stream
Step 1: Ensure Your Vehicle Types are Set Up
In order for the Vehicle Upload to work, you need to have your Vehicle Types created in advance of trying to upload your vehicles. This is because each vehicle must be assigned to a Vehicle Type when it is being imported.
If you need any help with this, then please check out our ‘Adding a Vehicle Type’ help article.
Step 2: Download the Vehicle Export
In the ‘Overview’ section of the ‘Vehicle Details’ screen, click Actions and then click ‘Export’.
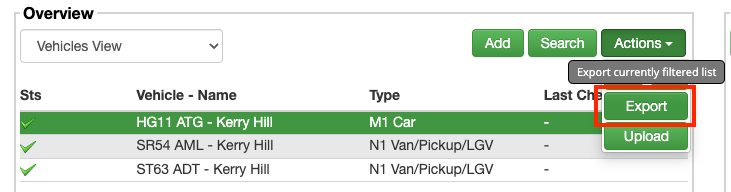
This will download either an XLS or CSV file (depending on the default export type set in your account), containing columns for all of the fields on the Vehicle Details screen.
If you want to download the file with some example data in, make sure to use the ‘Search’ button to filter the results to show you the existing vehicles that you’d like to use as examples.
Step 3: Add Your Vehicles to the Spreadsheet
Open the downloaded XLS or CSV using your preferred spreadsheet editor.

Enter the details for each of your vehicles into the corresponding columns on the Spreadsheet, ensuring that the data is formatted in the same way as the existing vehicles in the sheet.

(Please note that the top vehicles have only been greyed out to highlight the new vehicles that have been added)
Once you’ve added all your vehicles, save the spreadsheet as a CSV or XLSX file ready for upload.
Step 4: Upload Your Vehicles
Head back to the Vehicle Details screen in Stream and in the ‘Overview’ section, click ‘Actions’ then click ‘Upload’.

In the popup window, locate and select the CSV or XLSX file you have saved.
When your Vehicles have been uploaded, you will see a rundown of the status for each row on the sheet you have uploaded.
If there are no issues, it will state that the vehicle has been ‘Uploaded successfully’.
If the sheet contains any vehicles that were already in your Stream account, it will state ‘Vehicle already exists’.
If Stream has any issues validating any of the fields in your upload file, these vehicles will not be uploaded into Stream and it will display the issues and advise how to fix them. You will then need to make these changes to your upload file and then save and re-upload.
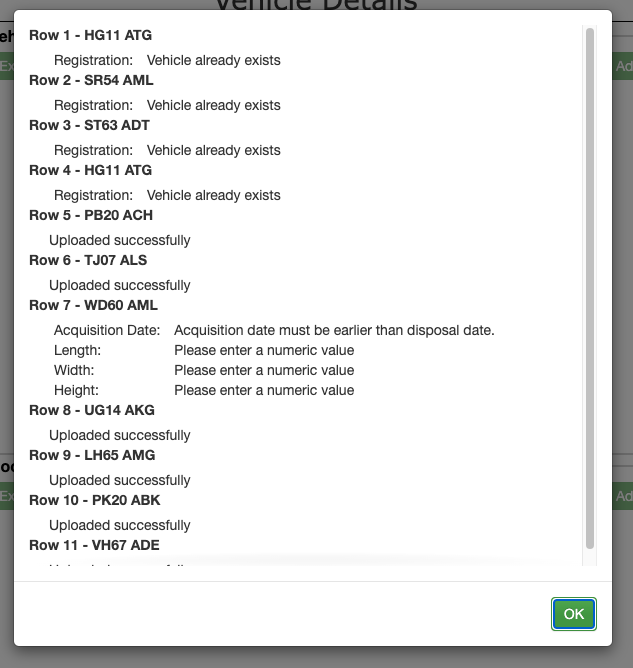
Click ‘OK’ to continue.
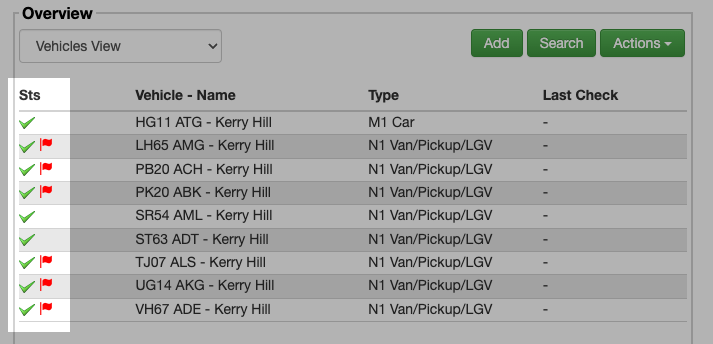
You will now be returned to the Vehicle Details screen and will see your new vehicles list in the ‘Overview’ section.
For every new vehicle added, Stream will automatically create a number of bookings against each vehicle based on those configured for the ‘Vehicle Type’ being used.
Vehicles with ‘empty shell bookings’ will be highlighted in your vehicle list by a red flag icon.
You will then need to manually add the relevant dates to the bookings for each of the vehicles.
If you need help with adding vehicle bookings, you can read our helpful guide using the link below.