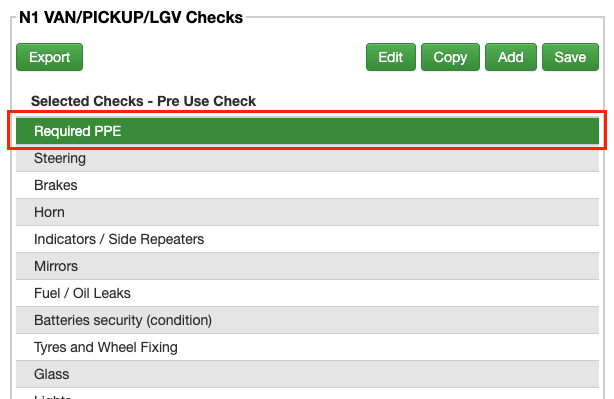
You may have noticed checks on your walkaround checklists in the Stream mobile app which do not offer an option to press the ‘Tick’ or ‘Cross’ buttons to complete or record a defect on. These are what we refer to as non-defect/pass-only checks.
What is a non-defect / pass-only check?
A non-defect/pass-only check is a type of check that cannot be failed.
These are best used as checks that are placed to serve as reminders to drivers, such as checking that the vehicle contains the correct PPE for a site visit.
You are neither required to confirm (tap the tick), or report a defect (tap the cross) on this particular type of check. However drivers can be requested to enter details or photos, for example to evidence that the vehicle did contain the required PPE, as per the example mentioned above.
See the below screenshot for an example of how the non-defect/pass-only check appears in the check list.

Adding a Non-Defect/Pass-Only Check
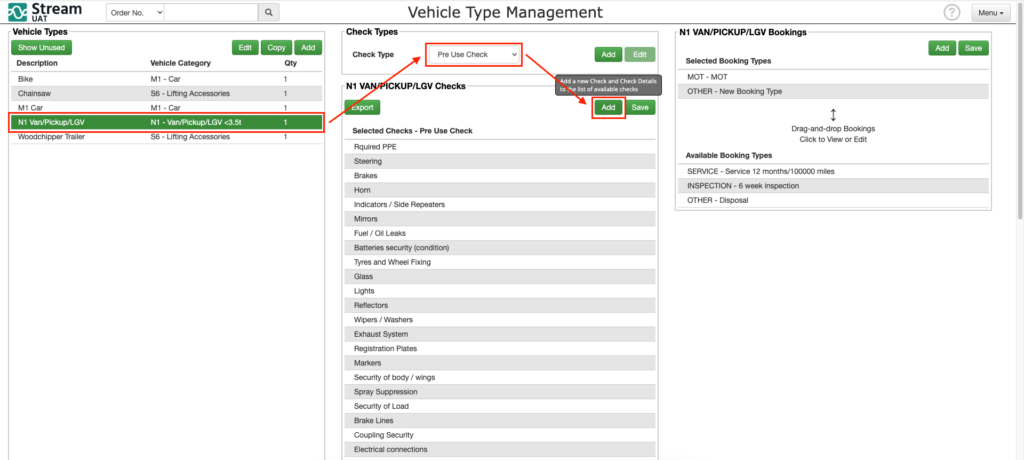
From the main menu in the top right corner of Stream, click ‘Vehicle Types’.
In the Vehicle Types list on the left, select the Vehicle Type for which you would like to add this new check.
In the Check Types module in the centre, make sure the relevant check type/checklist is selected.
In the list of Checks for that vehicle, click the ‘Add’ button.
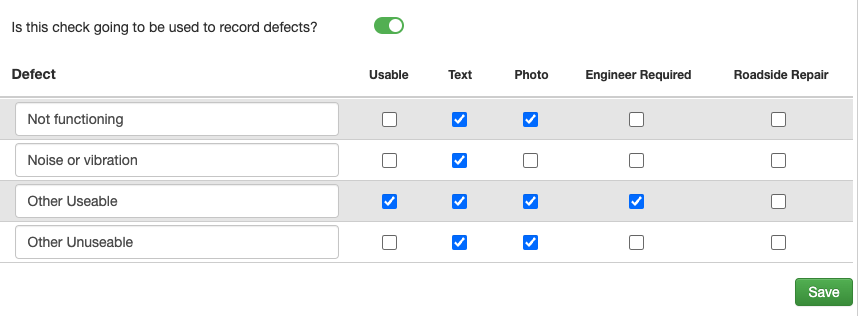
In the popup window, enter the relevant details for the check that you want to create and choose whether Text notes and photos are either optional or required.
Then make sure the ‘is this check going to be used to record defects?’ toggle is switched OFF.
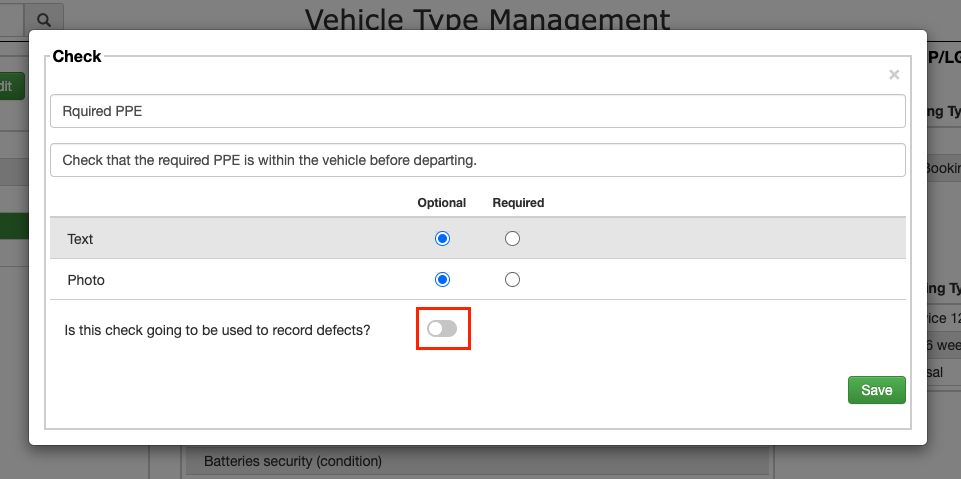
By switching this toggle off, you will make this a Non-Defect/Pass-Only check and the driver will not be required to tap either the tick or the cross when completing the notes.
However if you have set the Text and Photo fields to ‘Required’ they will need to enter notes and capture photos in the fields that appear on the check in the Stream mobile app.
Click ‘Save’ once you are happy with the details you’ve entered for this check.
The check will now appear in the list of checks on that Check Type.
Editing a Non-Defect/Pass-Only Check
You can turn normal checks into Non-Defect/Pass-Only checks and vice-versa by editing the checks listed under the check type.
Simply follow the process as above, however when you select the ‘Check’ under the relevant ‘Check Type’, instead of clicking ‘Add’, you can click the ‘Edit’ button.
Here you can turn the toggle on or off to choose whether this check is being used to record defects against the vehicle.
Please Note:
By turning this option off for existing checks, you will no longer be able to record defects against those checks.
If you want to record defects on a check that was previously Non-Defect/Pass Only, you will also need to enter the defect options which appear when you turn the toggle on.
These will be the options which appear in the mobile app when the driver presses the ‘Cross’ on the check to report a defect. You can choose for each option whether the vehicle will remain usable if the driver selects that particular defect when performing their check.
Don’t forget to click ‘Save’ once you have finished editing the Check.
We also have separate how-to guides available specifically for creating custom checks and creating custom check types if you need additional help.