The ability for drivers to report and record accidents using the Stream Mobile App is something that can be achieved through the creation of a custom check type called ‘Report Accident’ or similar.
You can then create individual custom checks for the information you need to be recorded when a driver uses the Stream Mobile App to report the accident, and add these to your new ‘Report Accident’ check type. For example, you might want your drivers to capture information at the scene of an accident such as:
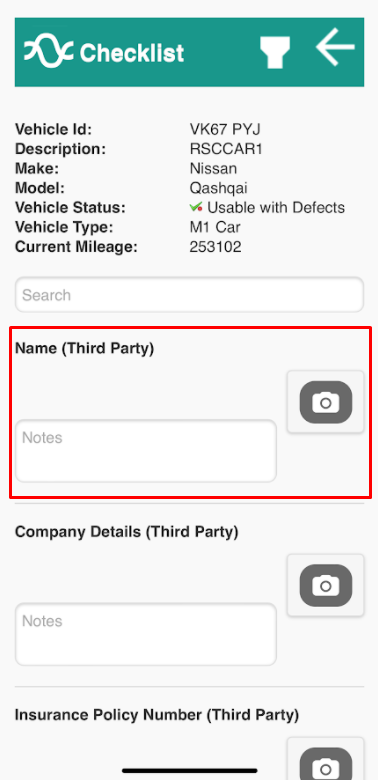
- Photographic evidence of any damage that has occurred to their own vehicle / third party vehicles / the environment
- Insurance details of any involved parties
- Contact details of involved parties
- Details of any injuries sustained
- Registration numbers of involved vehicles
Creating a ‘Report Accident’ check type
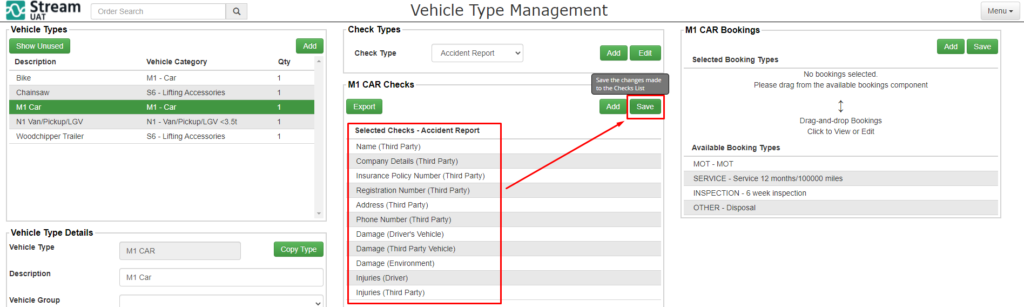
Step 1: Go to ‘Vehicle Types’
Go to the ‘Vehicle Types’ page in Stream (accessed through the main menu in the top right hand corner).

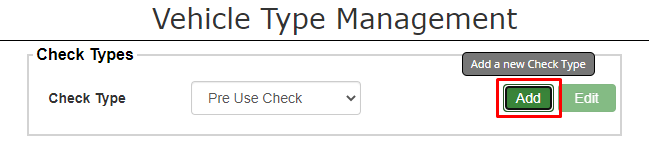
Step 2: Add a new check type
In the middle column under ‘Check Types’ click ‘Add’.
Step 3: Name and save the check type
In the description field, give the Check Type a name, such as ‘Report Accident’ and then choose whether you want it to be enabled or not. It might make sense to disable the check until you have finished configuring it, otherwise it will become immediately available in the Stream Mobile App for drivers.
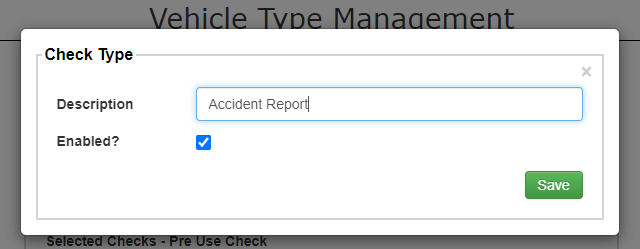
Click ‘Save’.
Step 4: Select the vehicle for the check type
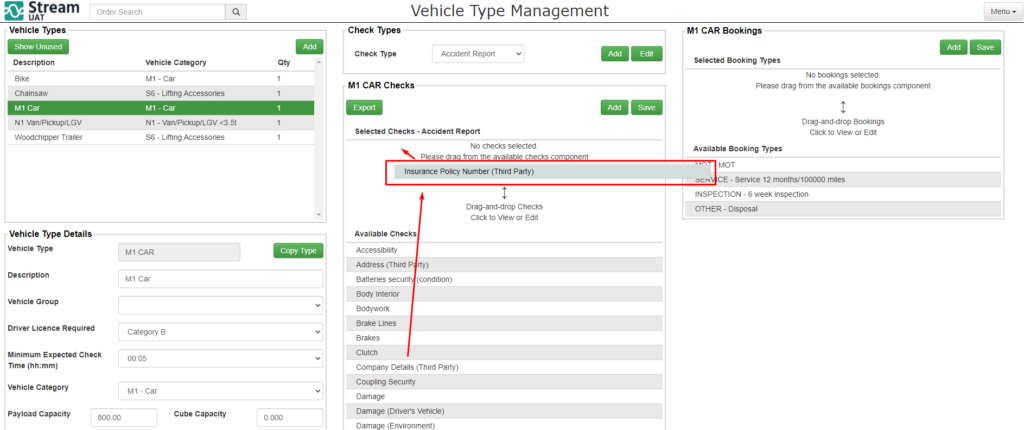
In the ‘Overview’ module on the left of the screen, select the vehicle that you want this check type to be used for and then in the ‘Check Types’ module, select the ‘Accident Report’ check type that you have just created from the dropdown list.
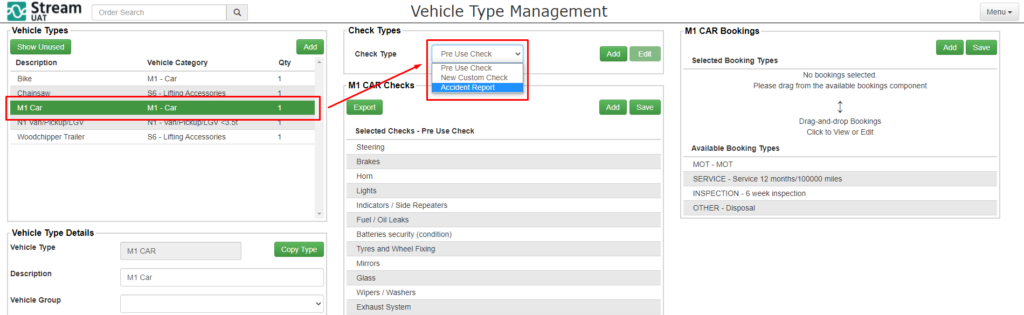
Step 5: Add checks to the accident check type
In the central column under ‘Checks’, you can now move individual checks onto into this check type by using the drag and drop functionality.
As this is a very specific check type, we’ll want to create a set of individual custom checks that relate to an accident.
In the central column under ‘Checks’, click ‘Add’, this will bring up the check creation input screen.
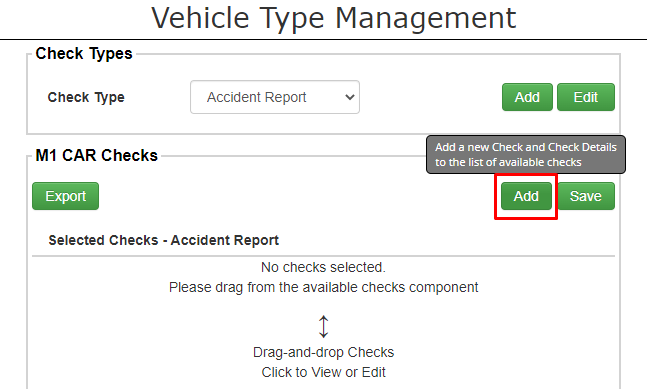
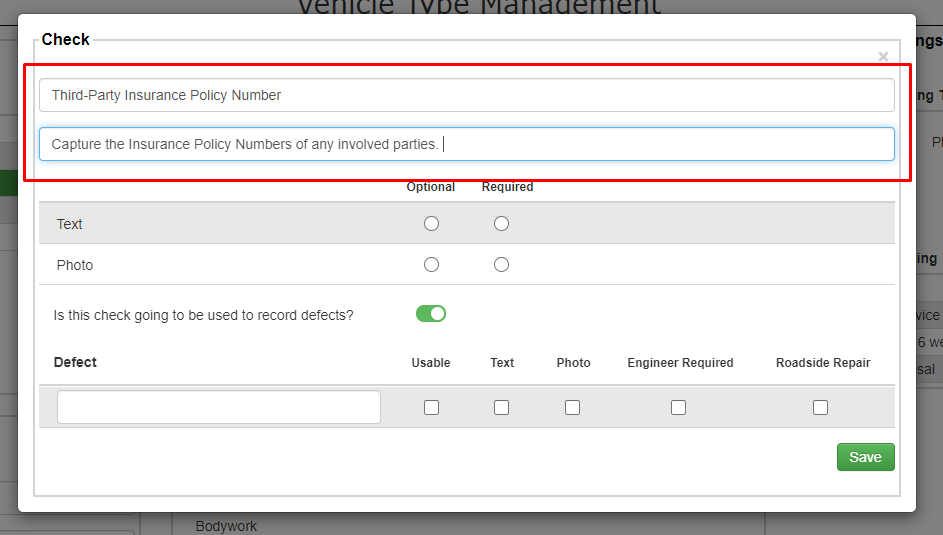
Step 6: Add a new custom check
Give your check a name and a description that can be clearly understood, as these are what will be displayed on the checks for Drivers inside the Stream Mobile App when they’re reporting the accident
The next section determines whether additional notes/text and a photo are required to be captured regardless of whether the check is passed successfully or a defect is reported.
Make a selection for each as to whether they are ‘optional’ or ‘required’.
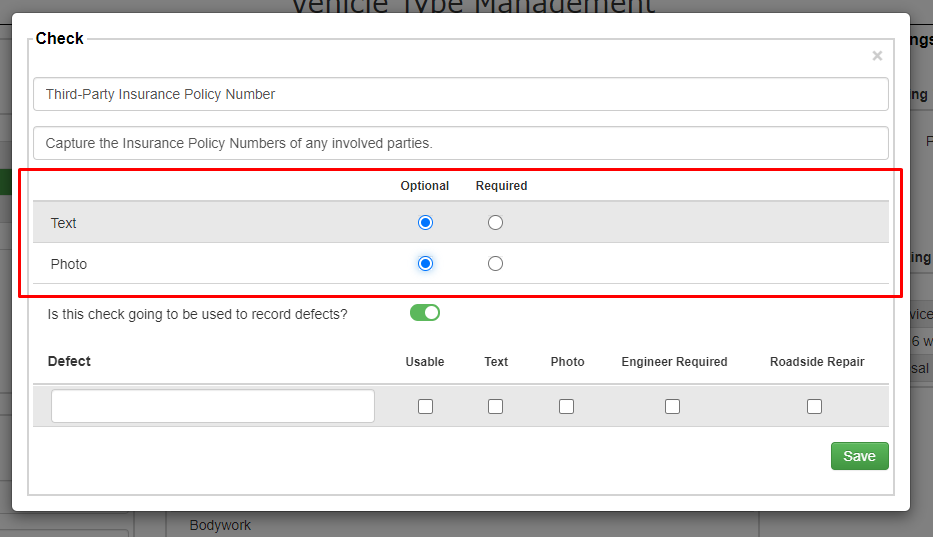
As we’re asking for Insurance Policy Numbers on this check, we’ve selected ‘optional’ as the capturing of policy numbers will depend on the nature of the accident.
The toggle button asks if the check is going to be used to record defects. As this check is purely informational, we’ll be turning the toggle ‘off’.
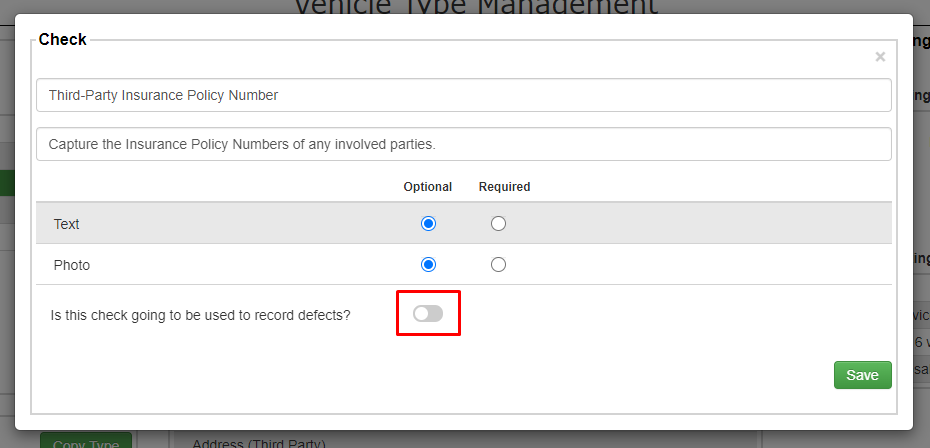
If this check was being used to record the damage sustained in the accident, you would want to set the text and photo fields to ‘Required’ and leave the record defects toggle ‘on’ and fill out the defect severity statuses appropriately to record the severity of the damage.
You can learn more about this in our guide on how to create Individual Custom Checks.
Step 7: Save the custom check
Once you’ve finished adding all the information for this particular ‘Accident’ check type, go ahead and click ‘Save’.
This will add this new custom check to the list of available checks and you are now free to drag and drop it into the ‘Accident Report’ check type that we created at the beginning of the guide.
Step 8: Continue creating and adding the checks
Repeat this process until you have added all the information that you’d like your drivers to capture at the scene of an accident and then press click ‘Save’.
If you chose not to enable the check type earlier, you can click ‘Edit’ in the Check Types module and enable the check type. However if you left the check type ‘enabled’ then the check type will now be available for drivers to select in the Stream Mobile App and use to report and record any accidents.
Please note:
Whilst you won’t need to go through the creation process manually for each vehicle type, you will need to select each vehicle type and add the ‘Accident Checks’ to the ‘Accident Report Check Type’ for that particular vehicle type.
Reporting accidents in the Stream mobile app
Drivers can now select the ‘Accident Report’ as their check type after selecting their vehicle in the Stream Mobile App.
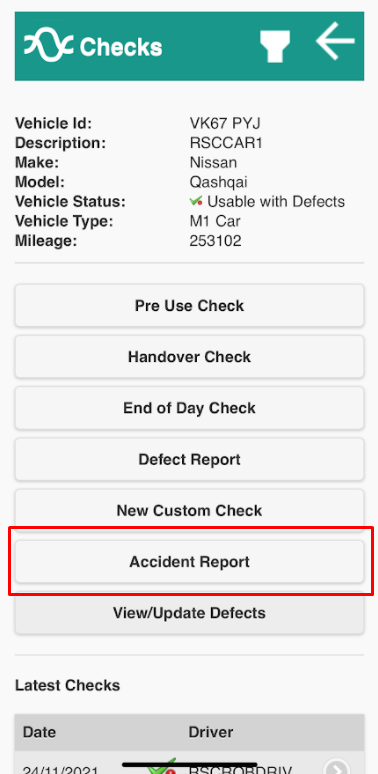
They can then work through the checks on the list, filling out the information that you’ve requested to be captured at the scene of an accident.
Learn more about creating custom check types.
Learn more about creating custom individual checks.