The Stream Mobile App is the application that drivers use to complete walkaround checks, report defects and perform deliveries and collections whilst out on the road.
Need to find out where you can download the Stream Mobile App? Follow our guide here.
Step 1: Select Your Vehicle
Open up the Stream Mobile App and select ‘Vehicles & Checks’ from the main menu.
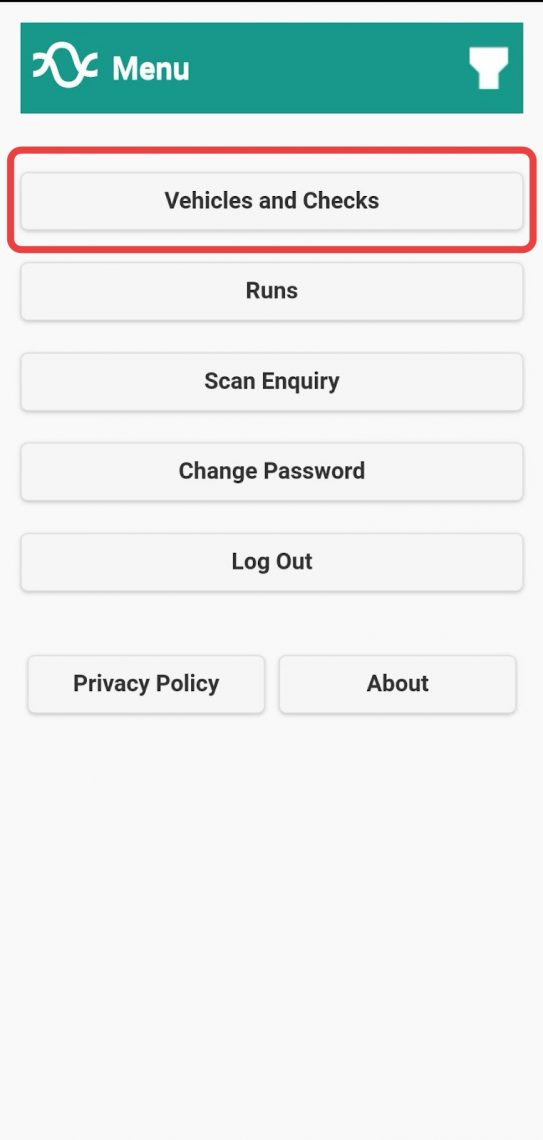
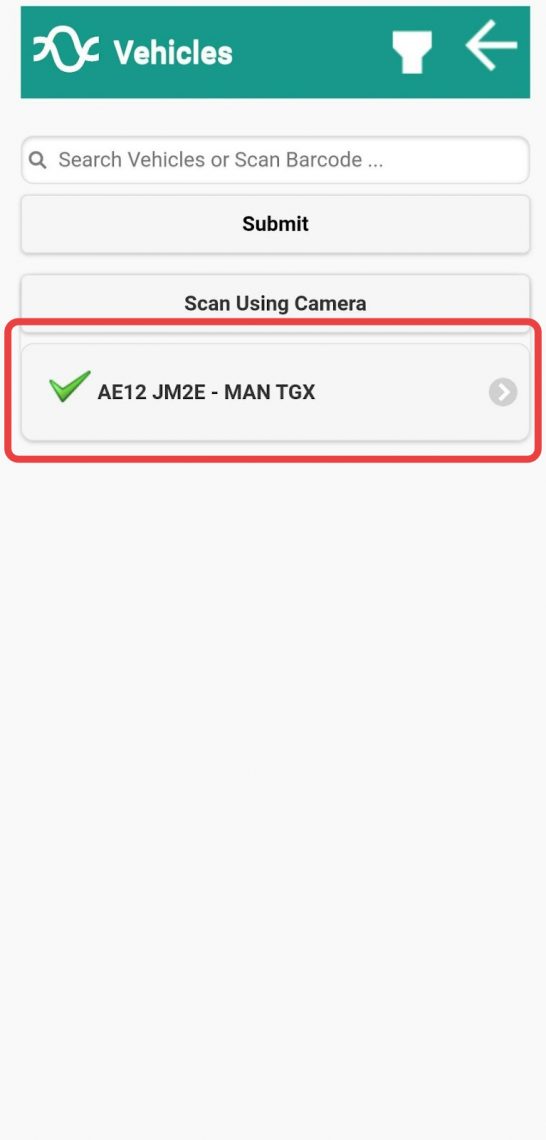
Here there are 3 ways to select your vehicle:
- Search for the vehicle using the bar at the top
- Scan the vehicle (if your company assigns bar codes to vehicles)
- Select your vehicle from the list
In this example, we’re going to select the vehicle from the list.
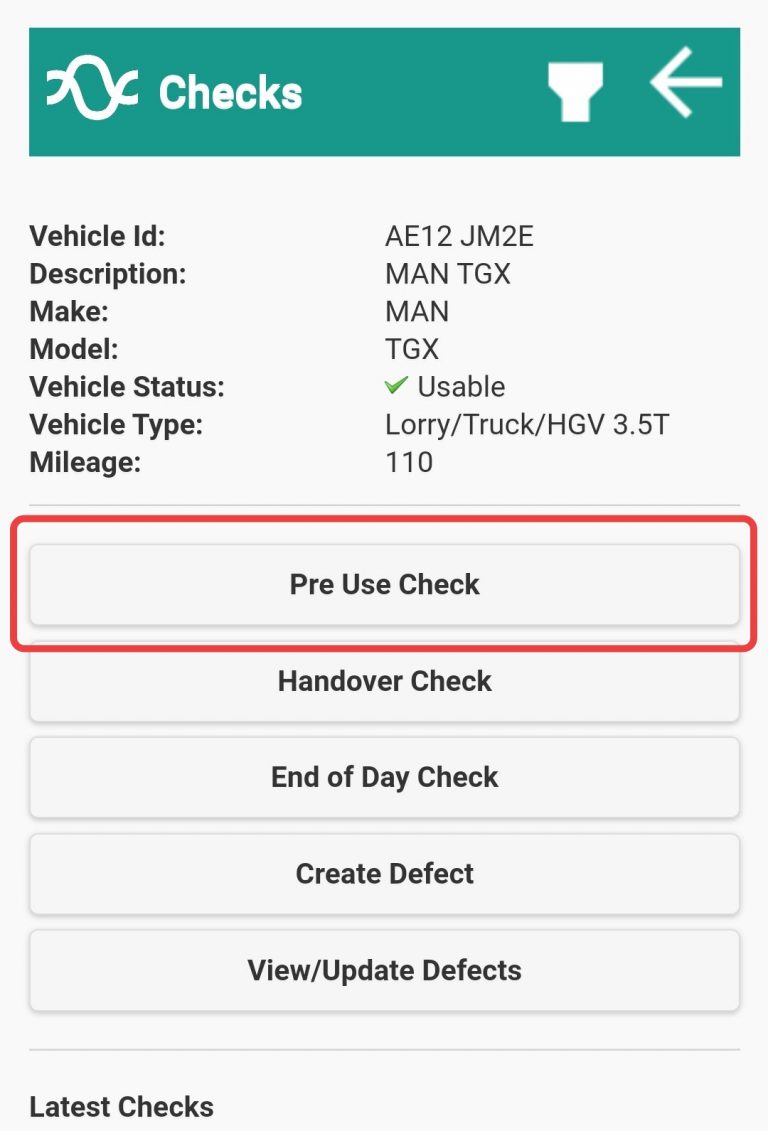
Once you’ve selected your vehicle, you will be taken to a screen which shows you:
- Details of the vehicle you have selected, including: status, type and mileage
- The list of checks that are available to be performed
- Details of previous checks that have been performed on this vehicle
Now select the check type from the list that you would like to perform.
Step 2: Enter Current Vehicle Mileage
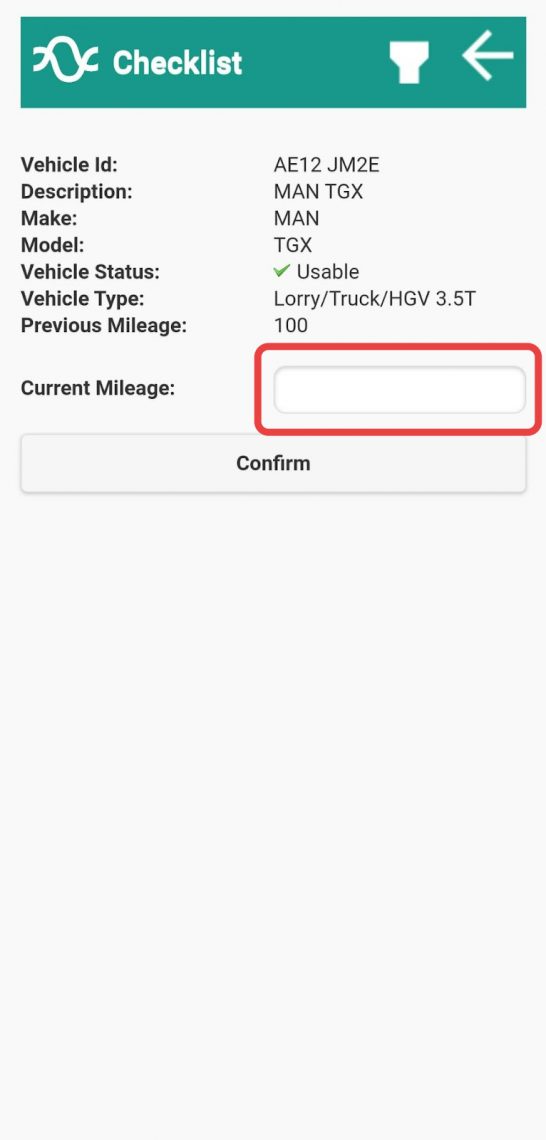
When you select your check type, the Stream mobile app will not let you progress to your checks until you update the current mileage of the vehicle that you plan to check.
Enter the current mileage and then click ‘Confirm’.
Step 3: Complete Your Walkaround Checks
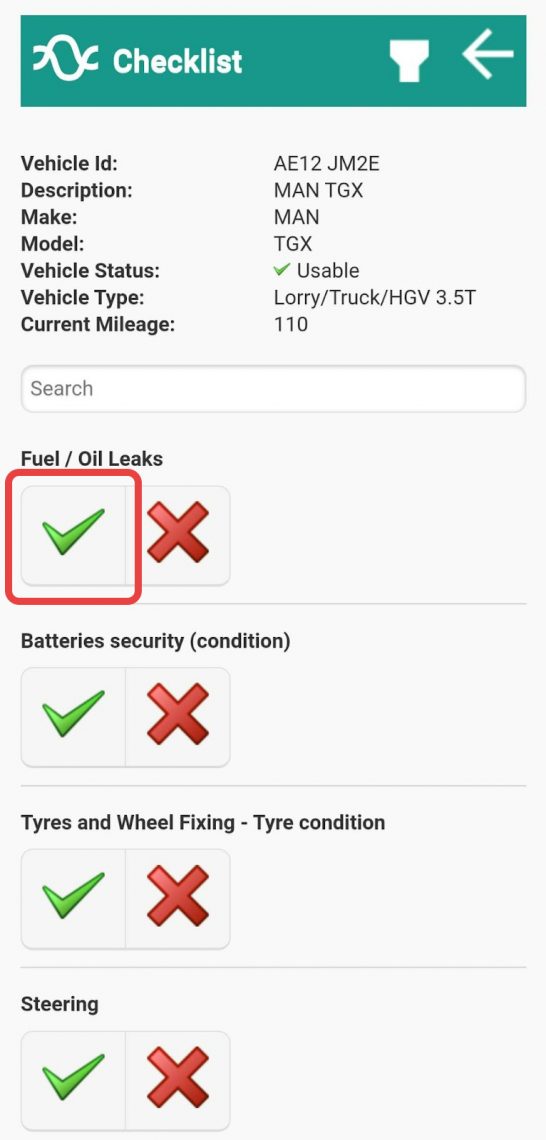
Once you’ve entered the vehicle mileage, you will see the checks screen, which details all the different types of checks that you need to complete.
Completing a check is as simple as pressing the green tick on that particular check.
If instead you need to report a defect on that check, you can press the red cross.
You can learn more about this in our guide on how to report defects in the Stream Mobile App.
Complete your first check, ensuring everything is correct and in working order and then press the green tick to confirm it’s been completed.
You will see that the app now shows that no defects have been reported on this check.
You will also see that you have the option to convert this into a defect, if you pressed the tick by mistake, or add text or a photo about this particular check.
Some checks may required to have a photo or additional information captured, but this depends on how your company has set up the checks.
Continue to complete each of the checks as required.
Step 4: Submitting the Completed Checks
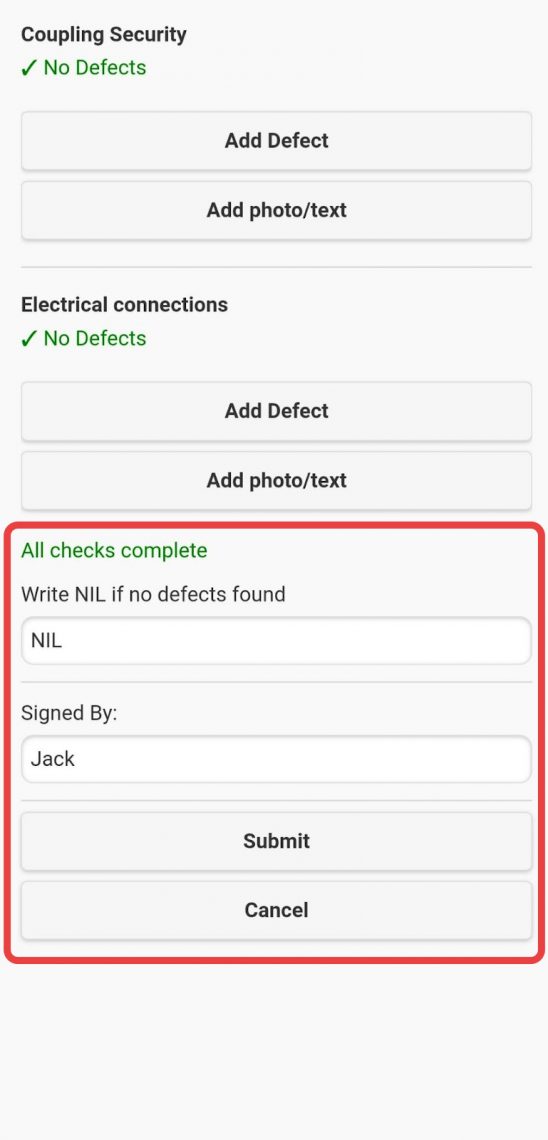
Once you have completed all of your checks, scroll to the bottom of the screen and fill out the two fields.
In this instance, we haven’t reported any defects, so we can type ‘NIL’ into the first field. If we had reported defects, it would ask us who we have reported these defects to.
In the second field, enter your name to let the system administrator know who it is that has completed the check.
Once you’ve filled out the two fields you can go ahead and click ‘Submit’.
The popup on the screen will show you the identity and status of the vehicle as a result of the checks that have been completed.
If you had reported any minor defects, the vehicle may be listed as ‘Usable with Defects’.
If you had reported major defects, the vehicle may be listed as ‘Unusable’.
But in this instance, we haven’t reported any defects so the vehicle is listed as ‘Usable’.
An automatic notification will be sent to your system administrator to let them know that the check has been successfully completed.
However many administrators choose to set it to only email them if a defect has been reported so that they can organise the relevant maintenance and repairs.
Click ‘OK’ to dismiss the popup window.
In our next article, we’ll show you how to report defects on a vehicle using the Stream Mobile App!