The Asset Management feature enables you to keep track of any reusable containers that you use to transport goods to your customers, in instances where the container may be left with the customer and require collection at a later date.

You can use Asset Management to track the current location of these containers, the time and date that they were delivered/collected, and how many of each type of asset is at a specific location.
Example use cases where Asset Management may be a useful feature include:
- Medical crates
- Gas canisters
- Water cooler bottles
- Beer kegs
- Pallets & Totes
Enabling Asset Management
Asset Management needs to be enabled for your account by a member of our support team.
Once enabled, Asset Management will appear as an item in the main menu, and it can be turned on/off for individual desktop users in the user’s custom settings.
There are two options available when using the Asset Management feature:
- Optional
This will allow the driver the option to drop off or collect assets at a stop - Mandatory
This will force the driver to complete the asset drop off & collection steps when completing a stop, prior to the customer signature being captured
If you would like to enable Asset Management, please contact Stream Support.
Adding an asset
When a driver scans an asset for the first time, it is automatically created in Stream and will be visible on the Asset Management screen.
Each successive scan of the asset will create a new transaction against it, stating where the asset has moved to, and from. Learn more about Asset Transactions.
If Asset Drop Off/Collection is mandatory, the driver will be forced to complete the drop off and collection steps at the end of a stop. (If there are no assets to drop off or collect, then they can simply tap ‘Finished’ to proceed)
If Asset Drop Off/Collection is optional, the driver can tap the ‘Drop Off’ or ‘Collect’ buttons on the stop’s ‘Items’ screens.
Dropping off an asset
- On the ‘Asset Drop Off’ screen, tap the ‘Scan Using Camera’ button (or just start scanning if using a device with a dedicated scanner)
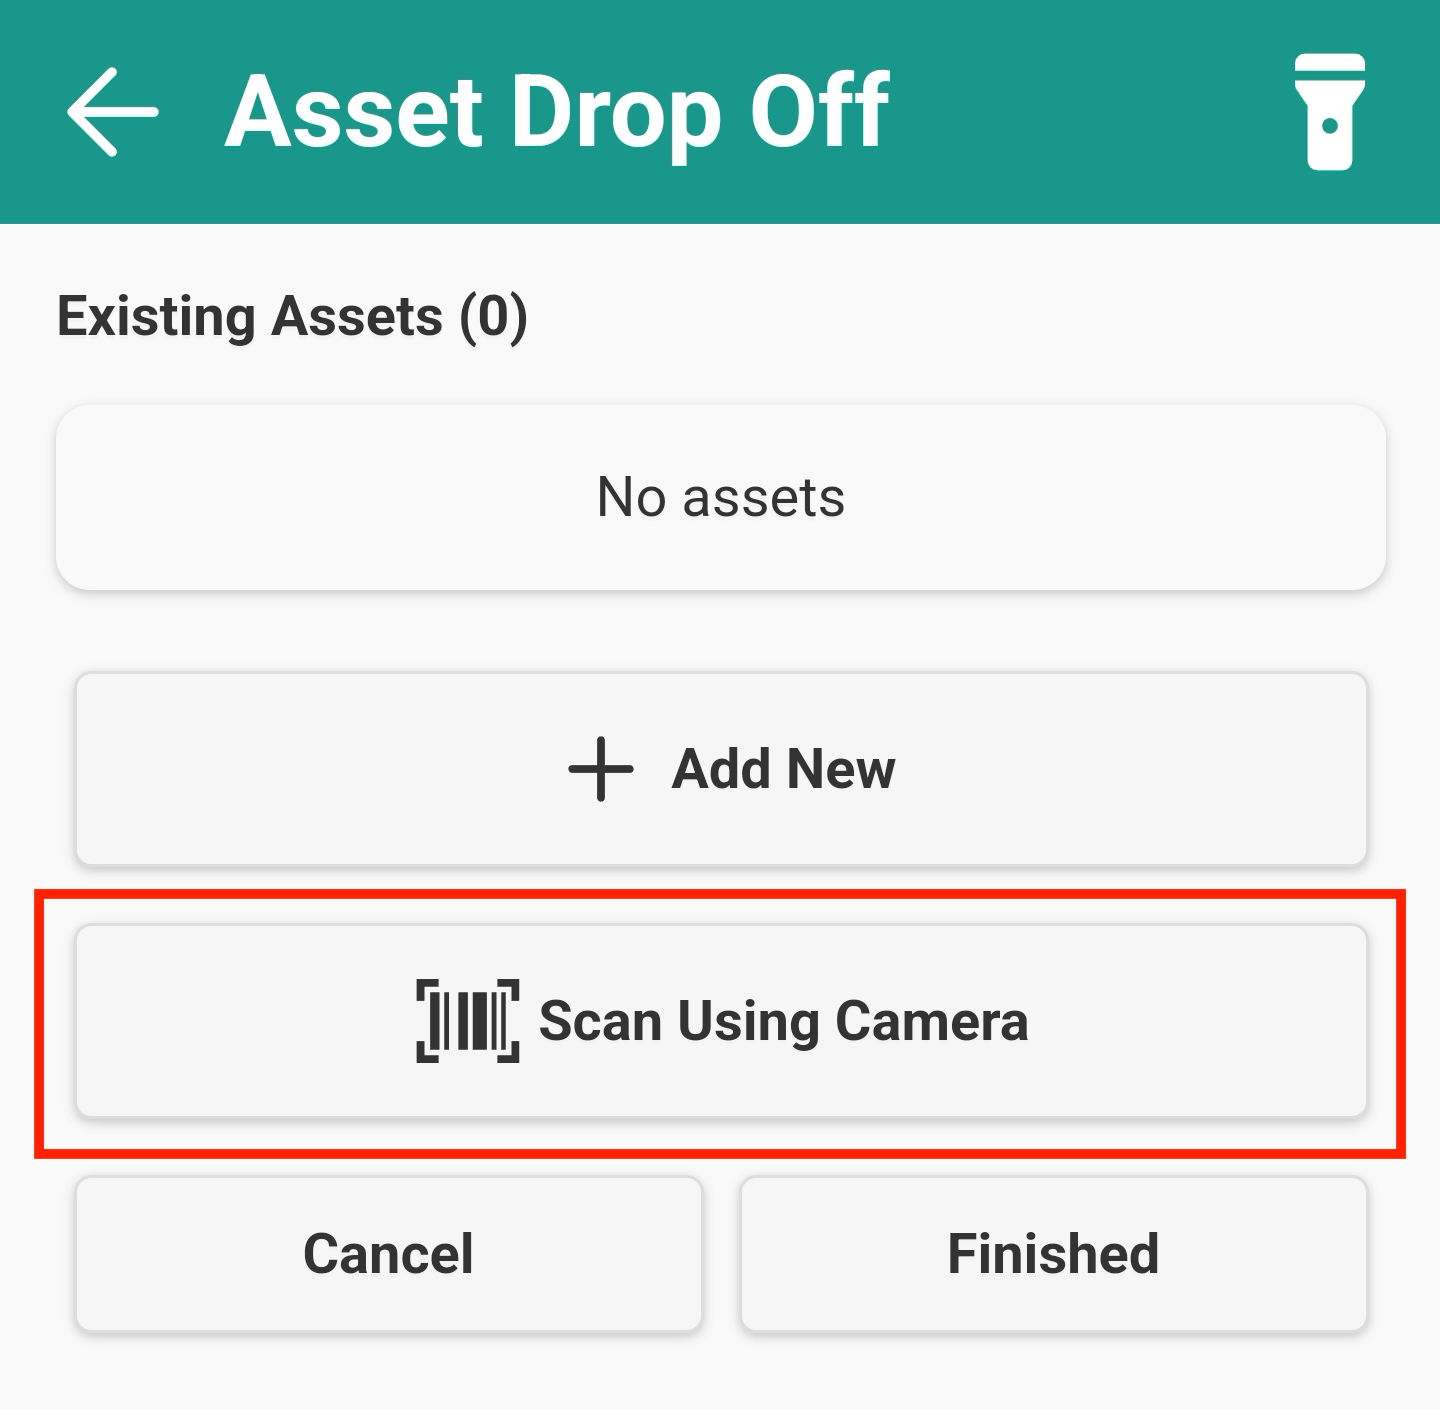
- Scan the barcode of the asset that you’re dropping off
- The asset will now appear in the ‘Existing Assets’ list. If you have scanned an incorrect barcode, you can tap the ‘Delete’ icon to remove it from the list
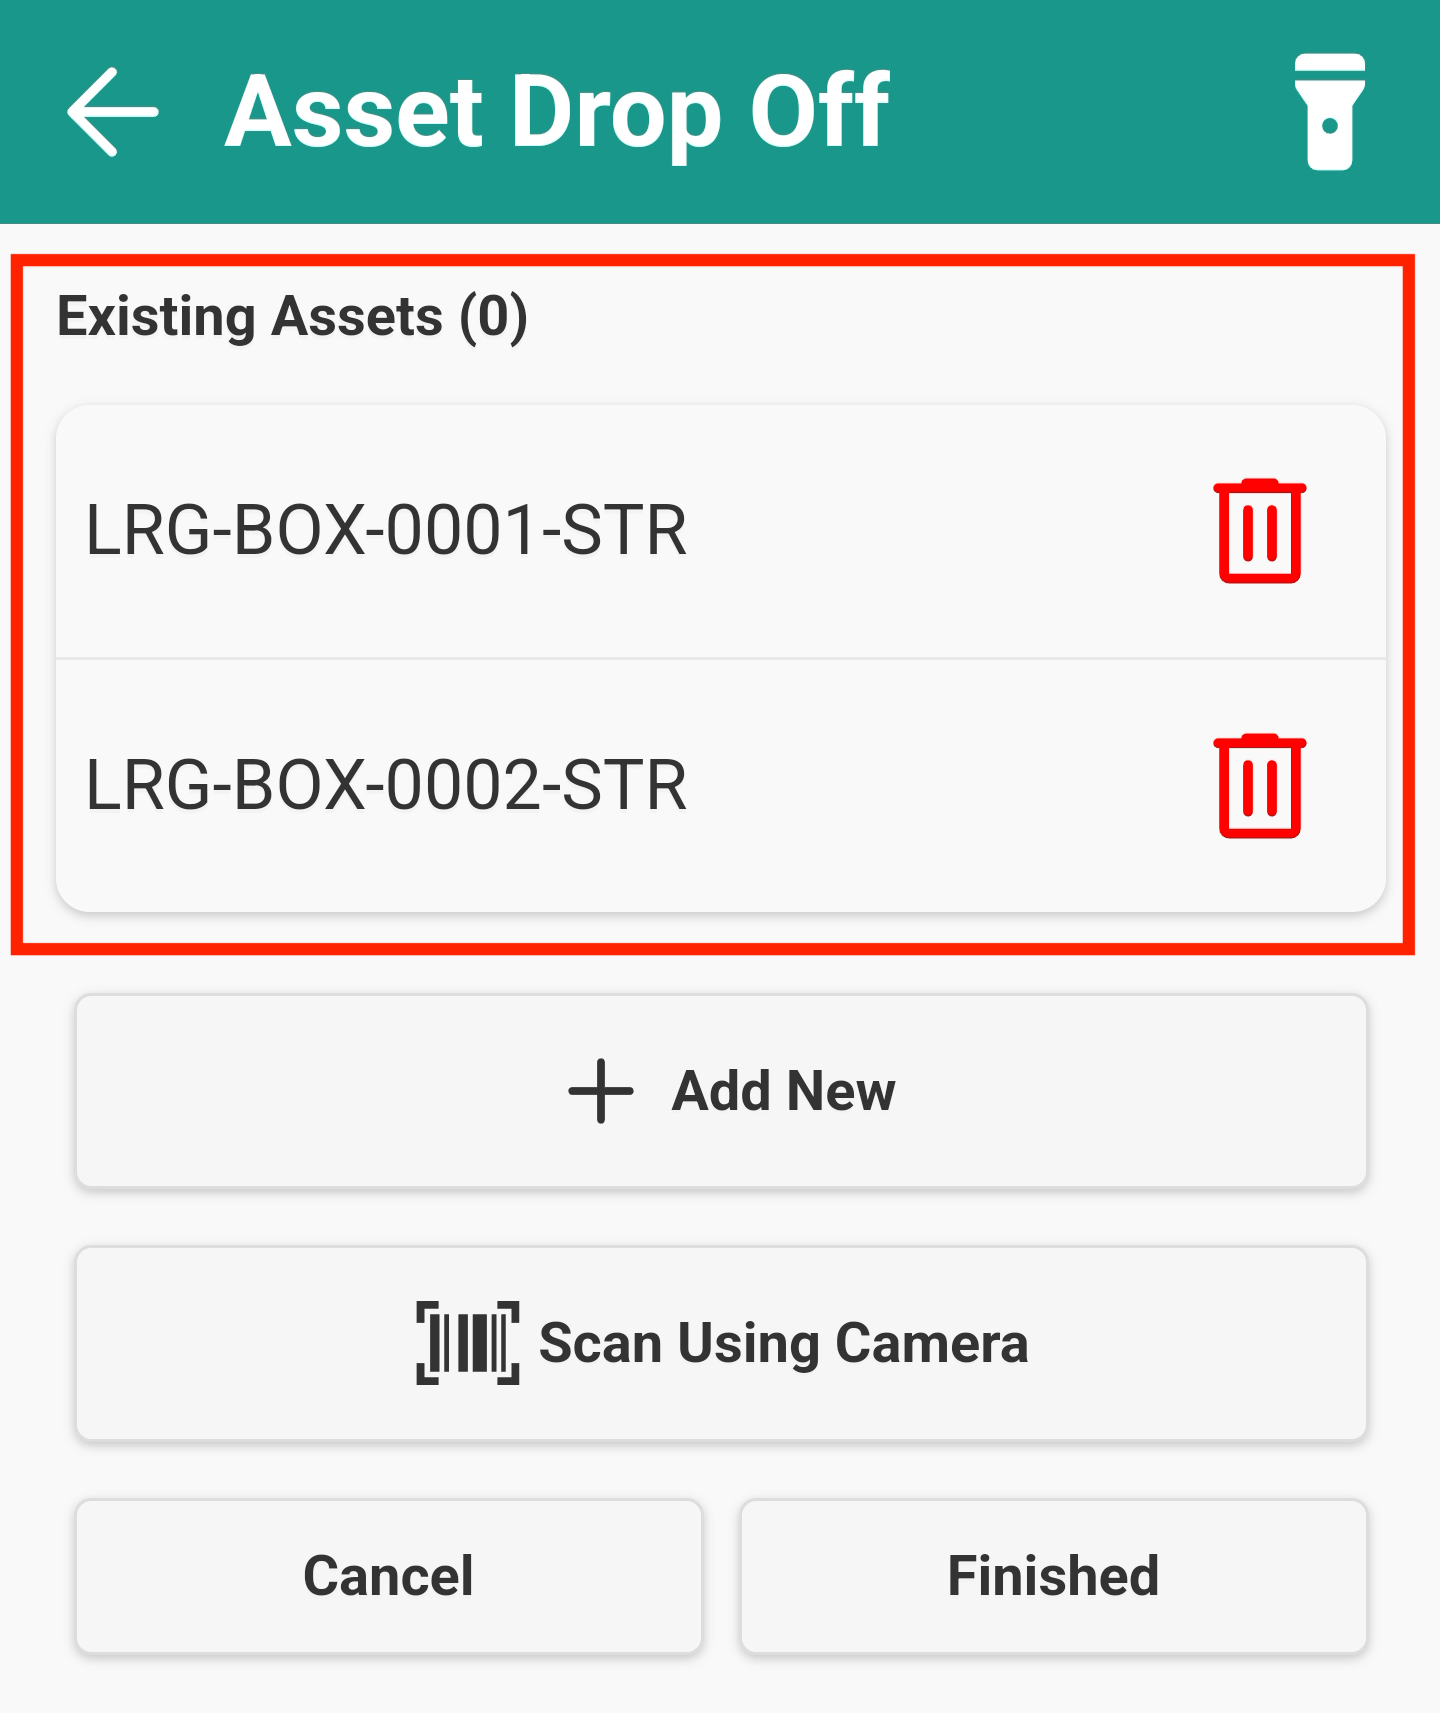
- Repeat steps 1-2 to scan as many assets as required for this drop off.
- Tap the ‘Finished’ button
Collecting an asset
- On the Asset Collection screen, you will see a list of the assets at the current location that need collecting. If using mandatory barcode scanning, this will say ‘Scan To Collect’, but if not, it will simply have a ‘Collect’ button.
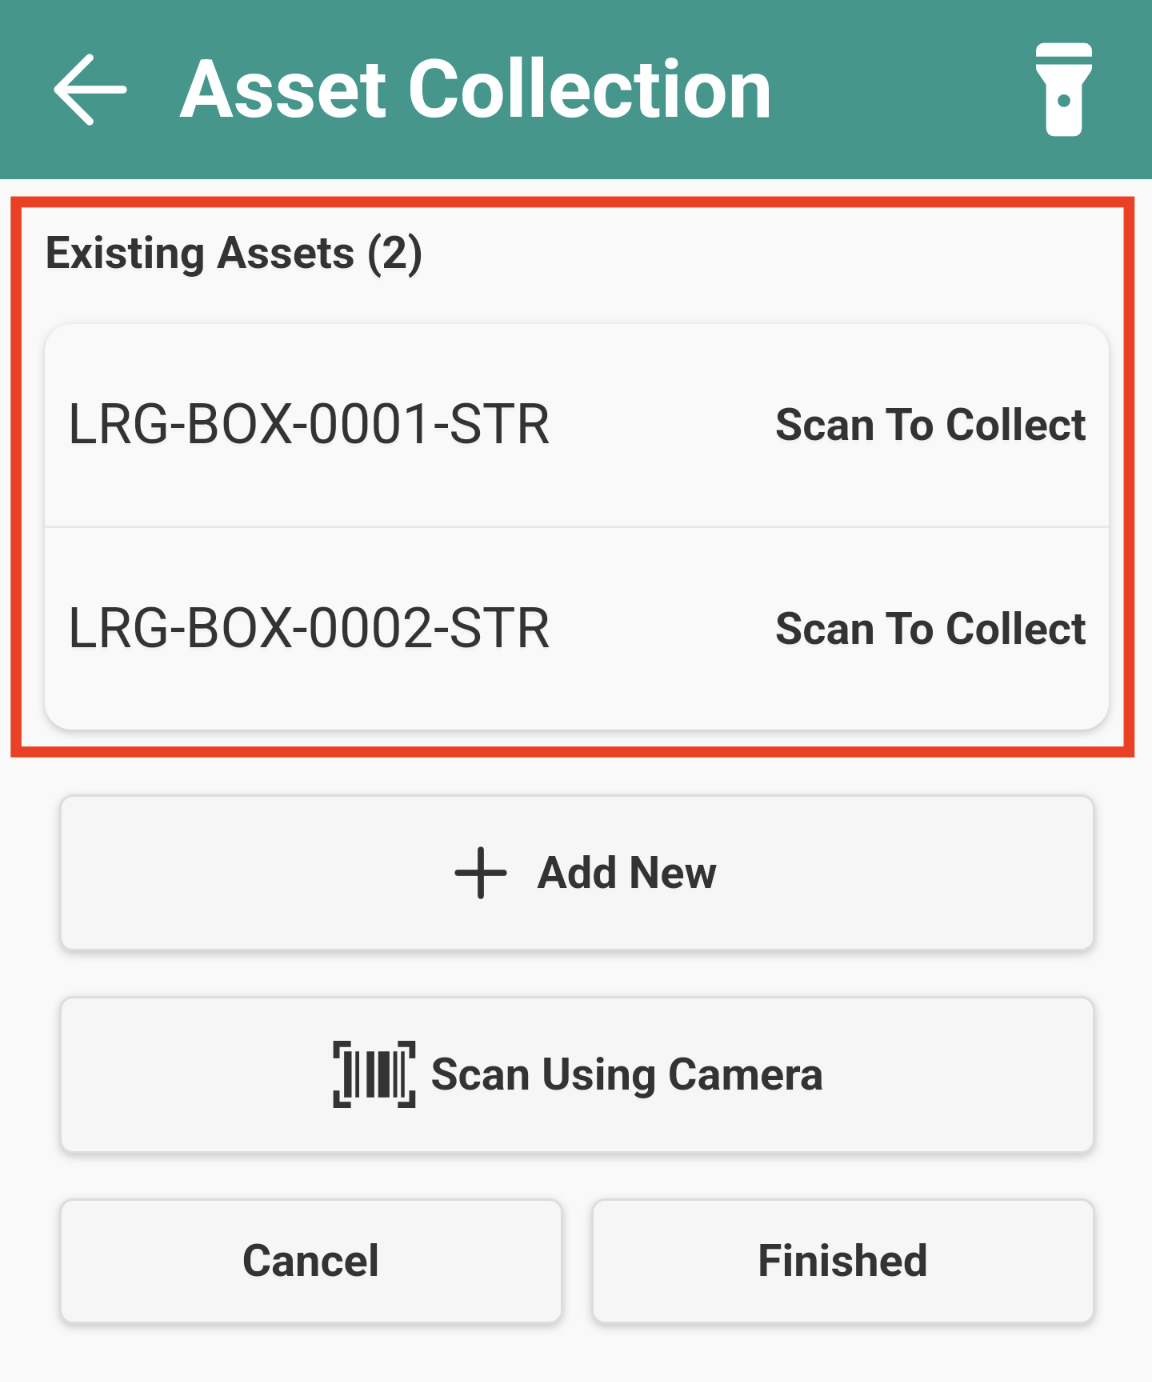
- Tap the ‘Scan Using Camera’ button (or just start scanning if using a device with a dedicated scanner)
- Scan the barcode of the asset you’re collecting
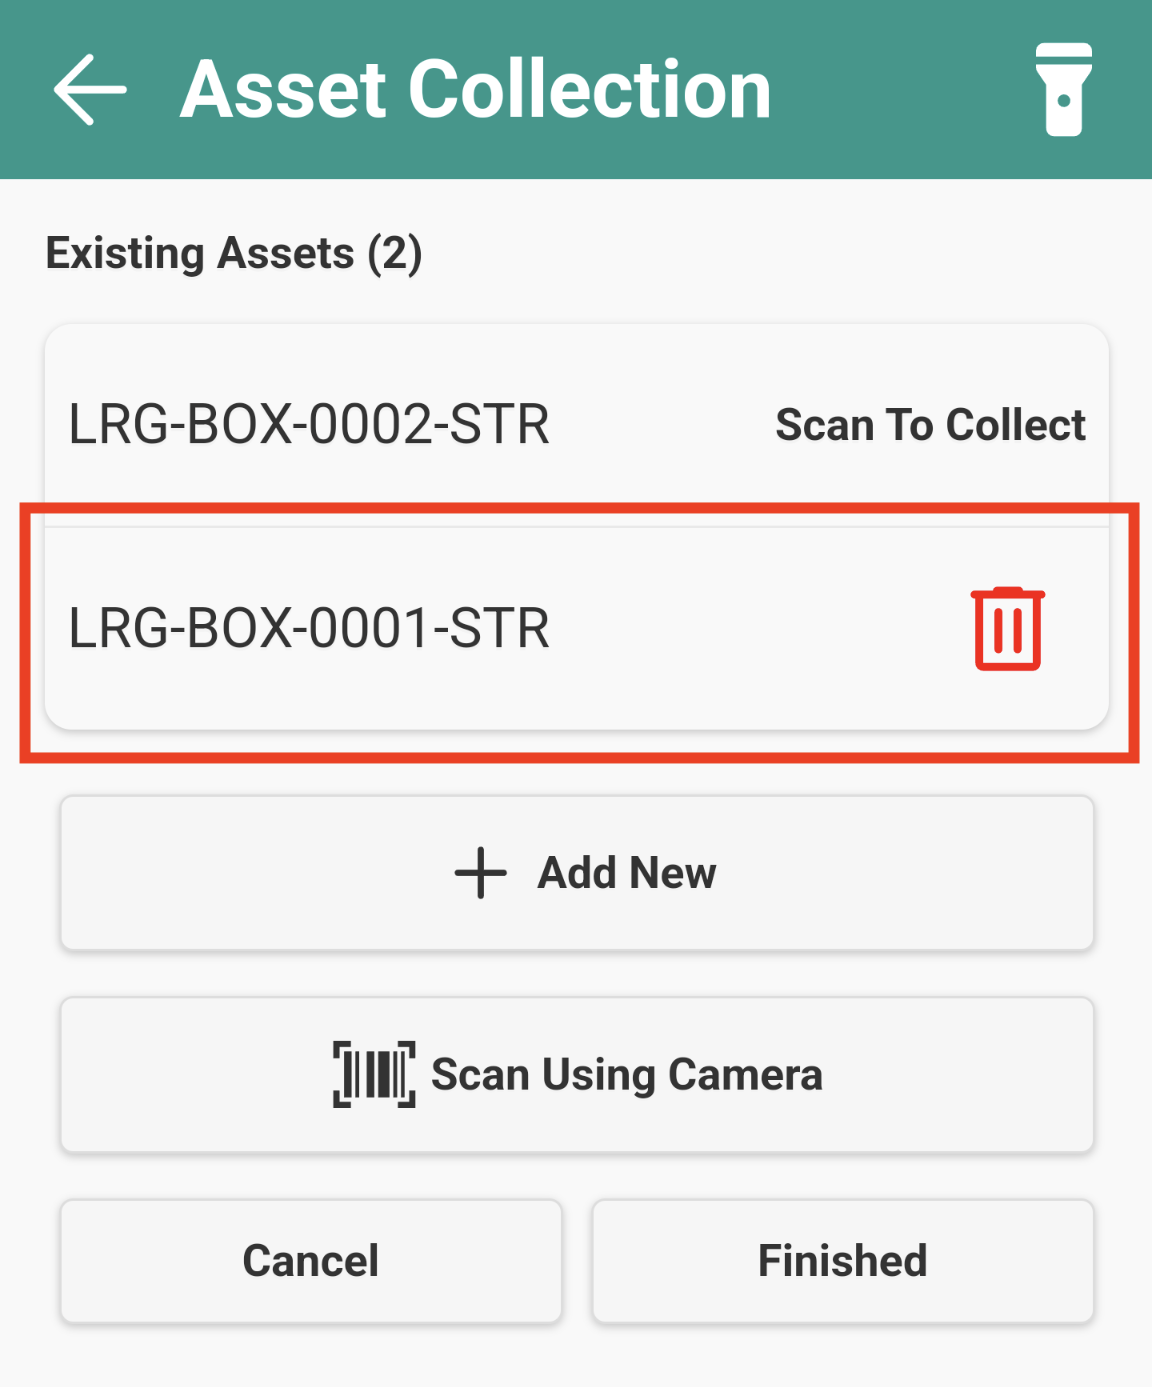
- When an asset has been scanned, it’s ‘Scan to Collect’ message will be replaced with a delete icon. If you have scanned an incorrect barcode, you can tap the ‘Delete’ icon and the asset will remain marked at this location
Viewing assets and asset locations
You can choose the view type dropdown in the ‘Summary’ section of the Asset management screen to either view a list of your existing assets, or a list of locations that currently have assets or have previously recorded asset transactions at them.
The options available in the view type dropdown are:
- Asset
This displays a list of existing assets, as well as a history of transactions performed against each asset - Location
This displays a list of locations that currently have assets, as well as any locations that have previously recorded asset transactions at them
Asset Transactions
The Asset Transactions section is visible on the right-hand side of the Asset Management screen.
This section displays all drop off and collection history of the selected asset, or if using the ‘Location’ view, it will display every asset drop off/collection that has occurred at this location, detailing:
- The asset ID
- Where the asset has moved from, and to
- Which user performed the transaction
- The date & time of the transaction
- The source of the transaction
Moving an asset
Moving an asset is an action that is performed on the desktop side of Stream.
You may wish to manually ‘move’ an asset for example if it has been collected by a driver but they haven’t scanned it when collecting it, in order to update it’s current location to be accurate.
To move an asset (Asset view):
On the Asset Management screen in the desktop side of Stream, with the ‘Asset’ view selected in the ‘Summary’ section dropdown:
- Select the asset you wish to move
- Click Actions > Move
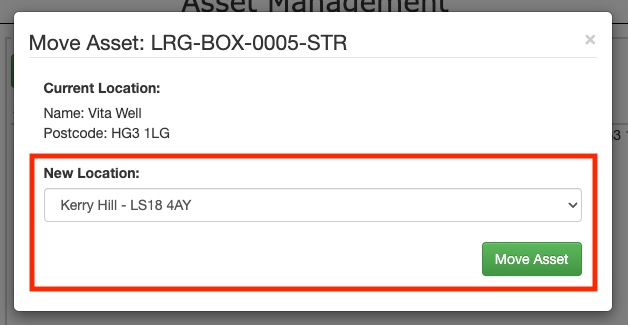
- Use the dropdown list to select the ‘New Location’ for the asset
- Click ‘Move Asset’
To move an asset (Location view):
On the Asset Management screen in the desktop side of Stream, with the ‘Location’ view selected in the ‘Summary’ section dropdown:
- Select the location that has the asset you wish to move
- Click ‘Adjust’
- Click ‘Move’ next to the asset you wish to move
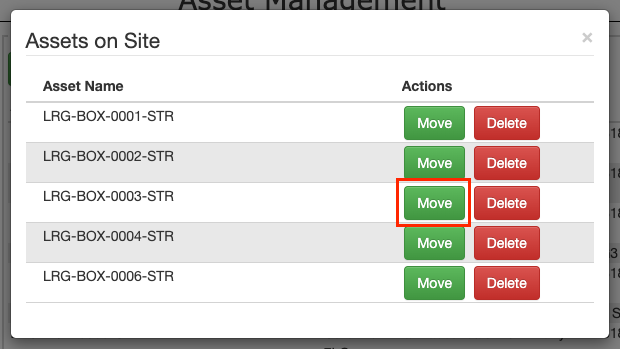
- Use the dropdown list to select the ‘New Location’ for the asset
- Click ‘Move Asset’

Deleting an asset
Deleting an asset is an action that is performed on the desktop side of Stream.
To delete an asset:
- Go to the Asset Management screen
- Select the asset in the ‘Summary’ section
- Click Actions > Delete
- Click ‘Yes’ to confirm you wish to delete the asset