The Car Transport variant of Stream is specifically configured for companies collecting and delivering vehicles and is now available within the standard Stream Mobile App (the Car Transport functionality will only be available to companies that have the variant of Stream enabled).
Follow the step-by-step guide below to learn how to use the Car Transport functionality within the Stream Mobile App.
Car Transport Workflow in the mobile App
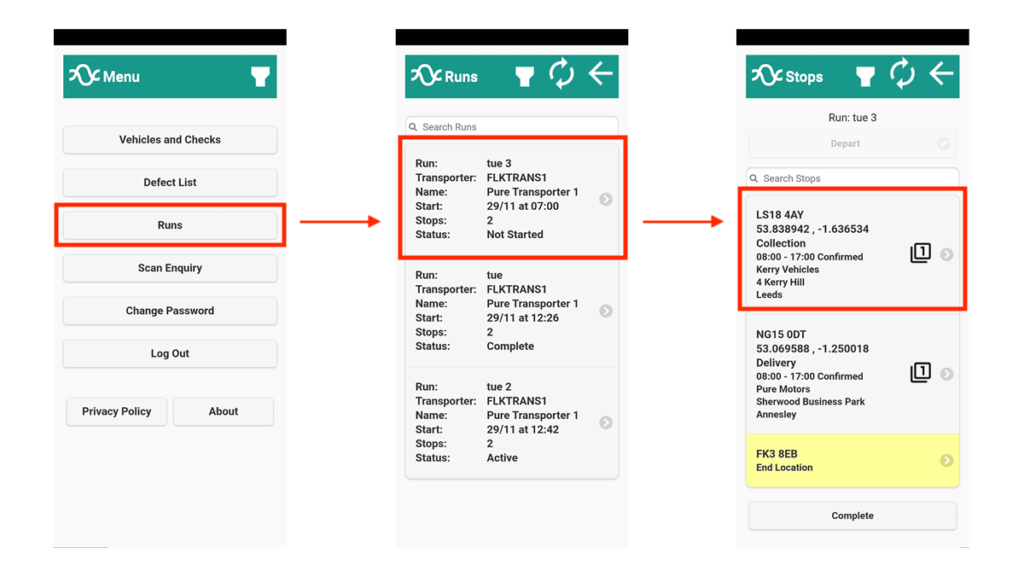
Step 1: Select the Run
From the main menu in Stream, tap the ‘Runs’ button.
On the ‘Runs’ screen, tap the run which you would like to perform.
The ‘Stops’ screen will then show you a list of stops that are to be performed on this particular run.
In the example below it shows two stops. The first stop is the collection of a vehicle from one address and the second stop is the delivery of that same vehicle to a different address.
Tap into the the first stop on the run, in this instance it is the collection stop.
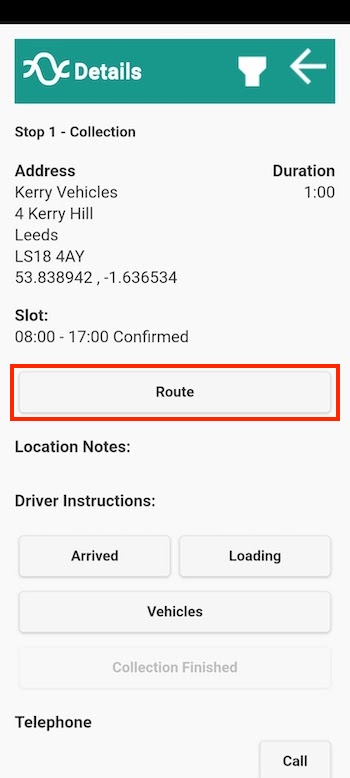
Step 2: Follow Routing Information to the Stop
On the Stop Details screen, you will see the destination address for the first stop, as well as a ‘Route’ button.
The ‘Route’ button will open your mobile navigation app and provide you with route navigation to the address of the Stop.
Tap ‘Route’ and follow the navigation to the stop.
Step 3: Collect the Vehicle(s)
Once you arrive at the Stop, leave your navigation app and go back into the Stream mobile app.
Tap the ‘Arrived’ button, and then tap ‘Loading’
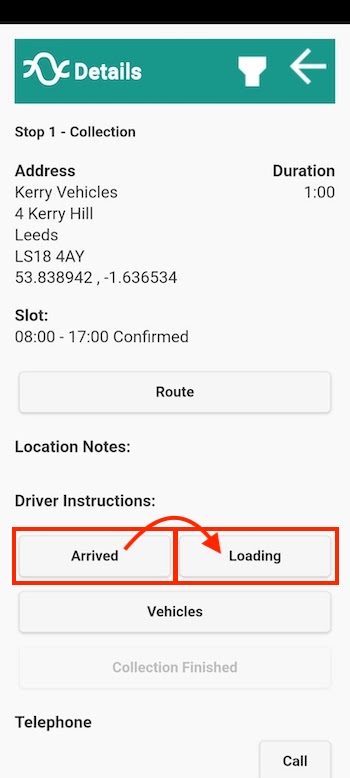
This will bring up the list of vehicles to be collected at this stop.
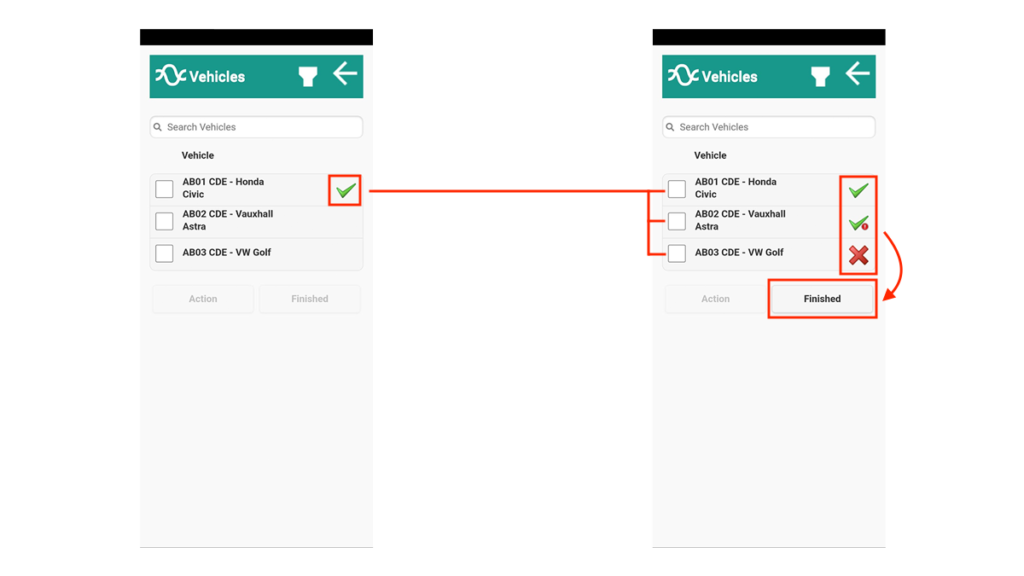
Select one of the vehicles by checking the relevant box and then press ‘Action’.
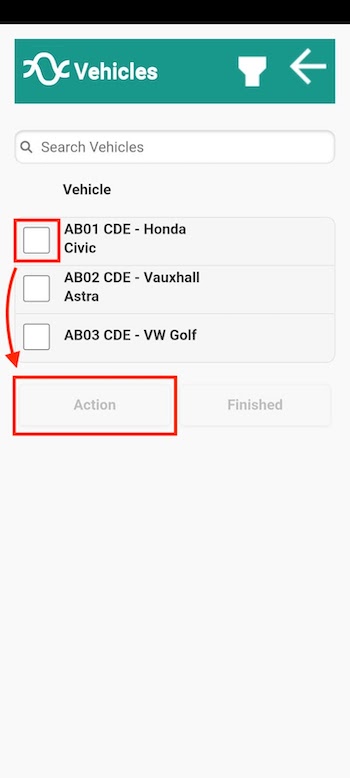
Selecting the vehicle will display the Vehicle ‘Log Event’ screen.
The vehicle event has a dropdown button with three options available. The vehicle can either be:
- ‘Collected with No Damage’, for which a questionnaire must be taken (Go to Step 4)
- ‘Collected with Damage’, for which a questionnaire must be taken and damage must be recorded (Go to Step 4)
- or ’Not Collected’, for which a reason must be selected (Go to Step 6)
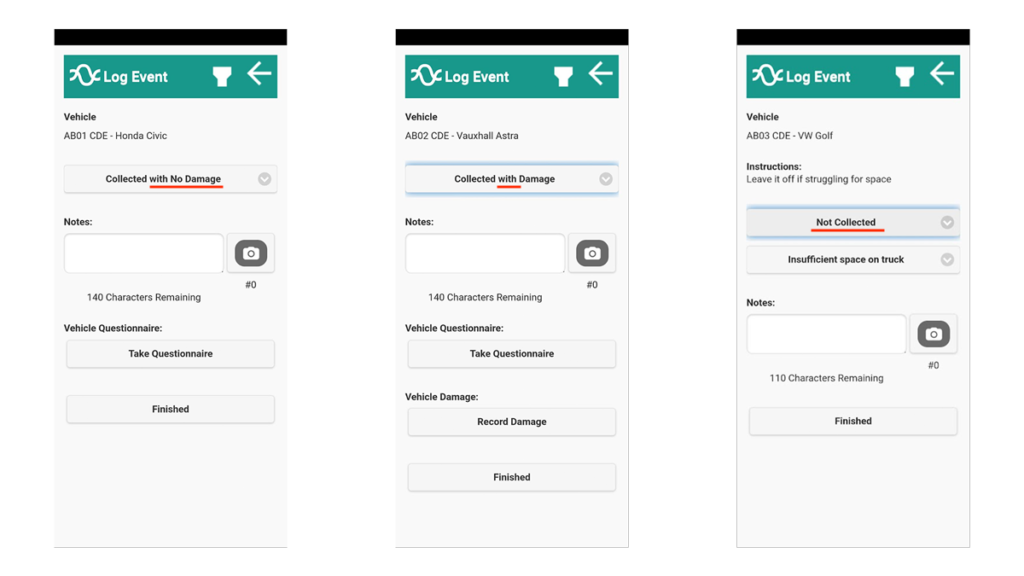
Once you’ve selected the relevant option from the dropdown menu, add any notes or photos required.
Step 4: Complete the Vehicle Questionnaire
The next step is to complete the vehicle questionnaire, which asks you for specific details about the vehicle, including:
- Mileage
- Number of Keys
- Any Documentation
- Any cables
Tap ‘Take Questionnaire’.
Fill out each of the fields with the correct details and then tap ‘Finished’.
This will return you to the ‘Log Event’ screen where you will see the results of the questionnaire you have just completed. These will be logged in the event notes in Stream.
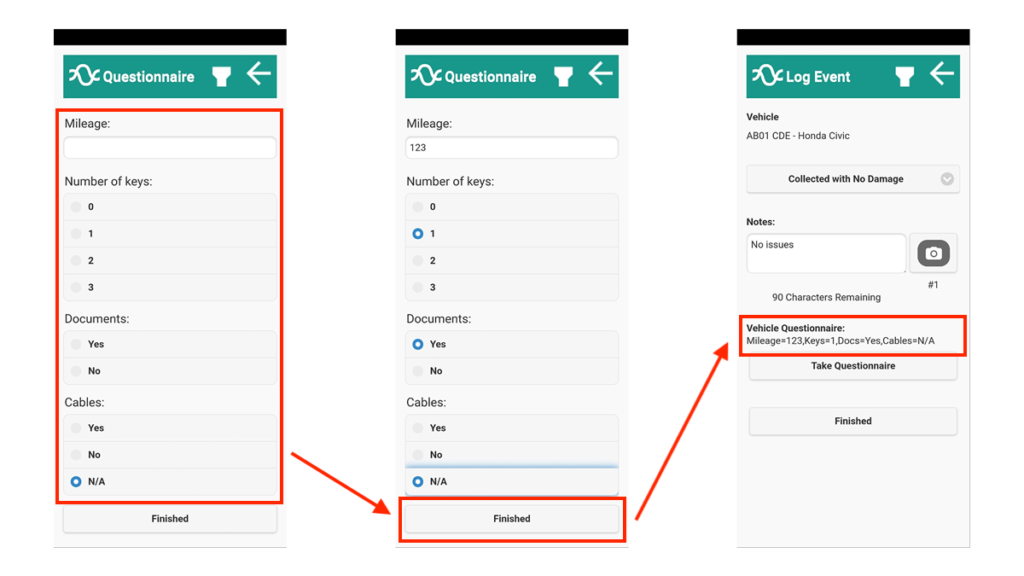
If you need to record damage to the vehicle, read Step 5.
If there is no damage to record, tap ‘Finished’ to be returned to the Vehicles screen and skip to Step 7.
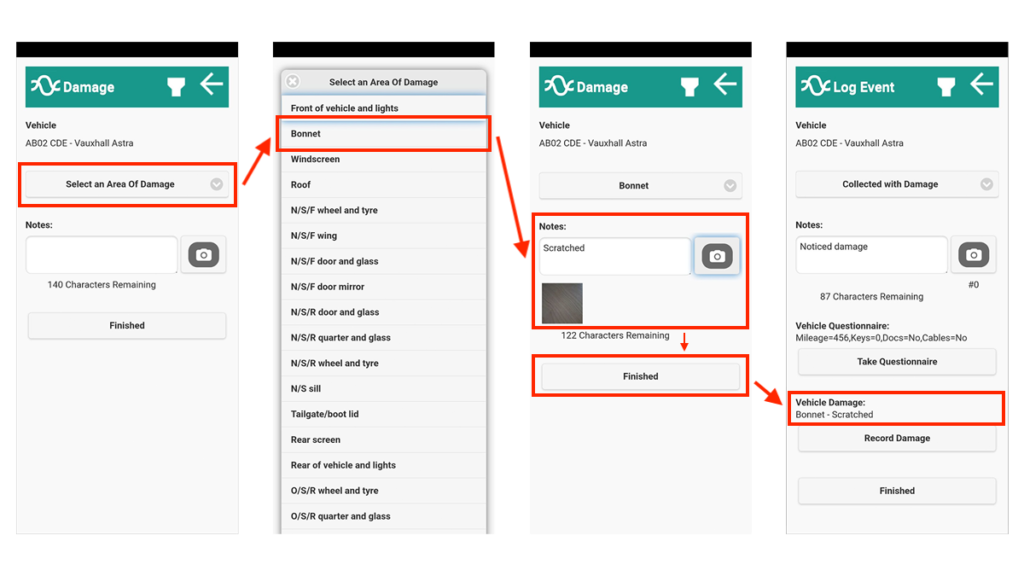
Step 5: Record any Damage
If you have selected ‘Collected With Damage’ you are required to complete the vehicle questionnaire and record details of any damage.
From the Log Event screen, tap ‘Record Damage’
Use the dropdown menu to select the ‘Area of Damage’.
Add any notes and photographic evidence of the damage.
Once you’ve added details of the damage, tap finished.
You will see that details of the damage have been displayed on the Log Event screen.
If there is any other areas of damage, tap ‘Record Damage’ to record the details and keep repeating this process until you have recorded all damage on the vehicle.
Once you’ve recorded all damage, tap ‘Finished’ to be returned to the Vehicles screen.
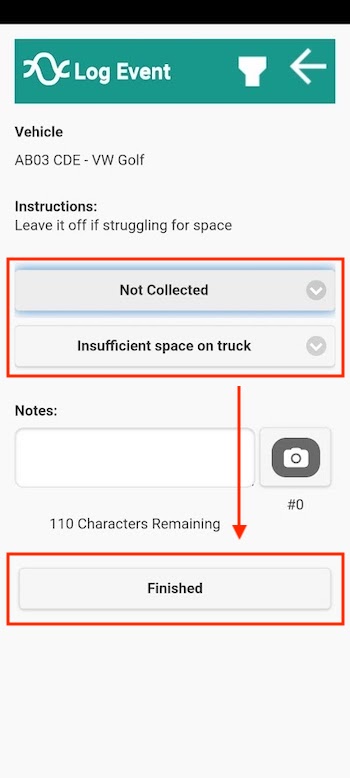
Step 6: If ‘Not Collected’
If you have selected ‘Not Collected’ you are required to provide a reason why the vehicle wasn’t collected.
Select the reason from the dropdown list and add any notes and photos as required.
Once you’ve added the details, tap ‘Finished’ to be returned to the Vehicles screen.
Step 7: Completing the Collection
Repeat Steps 3-6 as required for each of the vehicles you’re collecting.
As you complete each one, the status for that vehicle will be updated on the Vehicle screen.
Once you’ve recorded the details for each of the vehicles, tap ‘Finished’ on the Vehicles screen.
Then you’ll be taken to the ‘Stop Complete’ screen. Here you can add any notes about the collection, capture a required signature and then tap ‘Finished’.
This will return you to the ‘Stops’ screen where you will see the status of the collection has updated now that it’s been completed.

Step 8: Perform the Delivery of the Vehicle
On the ‘Stops’ screen, tap onto the next stop, which is the ‘Delivery’ part of this run.
Follow the process from Step 2 to get routing information to the destination and then tap ‘Arrived’ and then ‘Unloading’.
On the ‘Vehicles’ screen, select the vehicle that you are going to deliver.
If the vehicle was collected earlier on this run, then any notes and/or damage that were logged on collection are shown.
Select the delivery event from the drop down menu, the options are:
- ‘Delivered as Collected’
- ‘Delivered with Additional Damage’
- ‘Not Delivered’. (If the vehicle collection failed (‘Not Collected’) then only ‘Not Delivered’ is available.)
Then tap ‘Take Questionnaire’ and fill out the details in the same way as you did when collecting the vehicle.

Once you’ve recorded the details for all the vehicles you’re delivering, tap ‘Finished’ to be taken back to the ‘Stops’ screen.
Tap the ‘End Location’ to receive routing navigation to your final destination.
Once you’ve arrived, you can tap ‘Arrived’ on the stop screen, then ‘Complete’ on the Run screen to finish the run and the run status will be updated to complete.