Runs are your delivery and collection routes, complete with their assigned orders, drivers and vehicles.
This guide will walk you through the steps for creating and planning a new run.
Creating a run
To create a run:
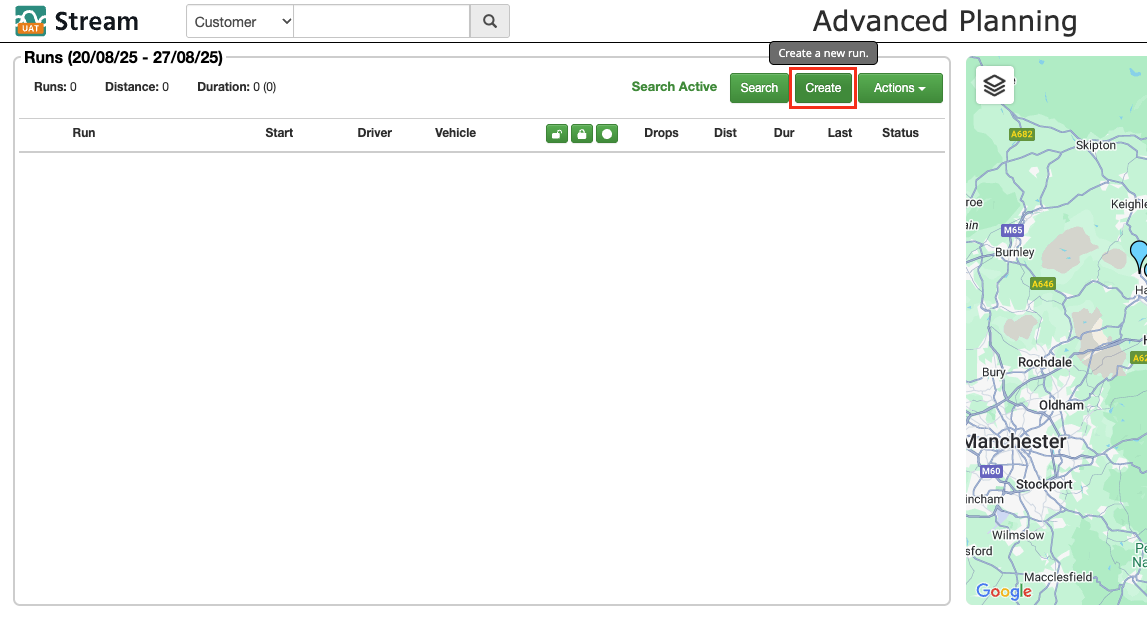
- In the main menu, click ‘Advanced Planning’
- In the ‘Runs’ list, click ‘Create’
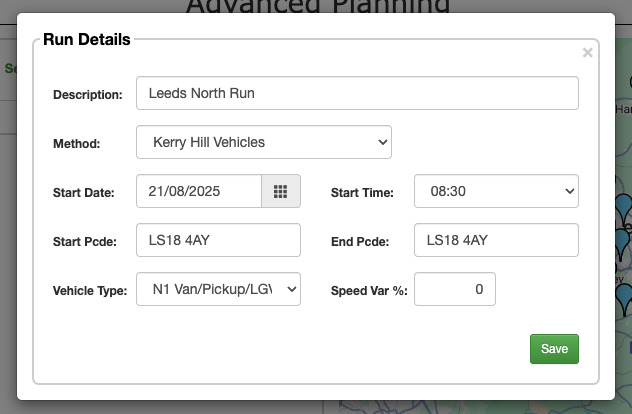
- In the ‘Run Details’ popup window, enter a name/description for the run.
- Select a ‘Delivery Method’ from the dropdown list. Get help with delivery methods
- Select a ‘Start Date’ and a ‘Start Time’ for the run. This will be used to calculate accurate delivery slots for each of the stops on the run.
- Select a ‘Start Postcode’ and ‘End Postcode’ for the run. This will be used to calculate the total distance and duration of the run.
- Select a preferred ‘Vehicle Type’ for this run. This will set the capacity for weight and volume for this run, as well as a speed variance if the vehicle type has one configured This will not restrict which vehicles you are able to select, but when assigning a vehicle to the run, it will show a red flag next to any vehicles which do not match the preferred type.
- [Optional] Set a ‘Speed Variance %’. Entering a positive (+) figure here will increase the anticipated speed of the driver, whilst entering a negative (-) figure will decrease the anticipated speed. This is used to adjust the ETAs of a run to make them more accurate.
- Once you’ve confirmed the details for the run, click ‘Save’.
Assigning a driver and a vehicle to a run
To assign a driver and a vehicle to your run:
- In the ‘Runs’ list, click on the relevant run to select it
- Once selected, click on ‘Unassigned’ in either the ‘Driver’ or ‘Vehicle’ column to open the ‘Resources’ popup window.

If these have already been assigned, you can click on either the Driver or Vehicle ID to open the ‘Resources’ popup. - Select the relevant driver and vehicle from the respective lists. If you can’t see the drivers or vehicles you were expecting, make sure you have the correct depot selected in the drop down menus at the top
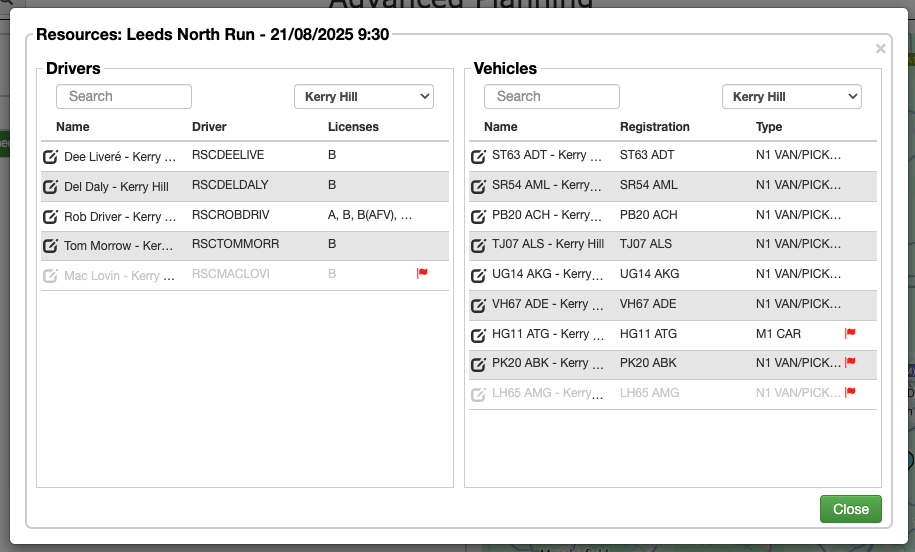
- Once your driver and vehicle are selected, click ‘Close’.
Planning a run
To add your orders to your run:
- In the ‘Runs’ list on the ‘Advanced Planning’ screen, click the run you wish to add orders to
- You then have three options for loading orders onto the run:
- Click and drag a single order from the ‘Unplanned’ section into the ‘Selected Run’ section
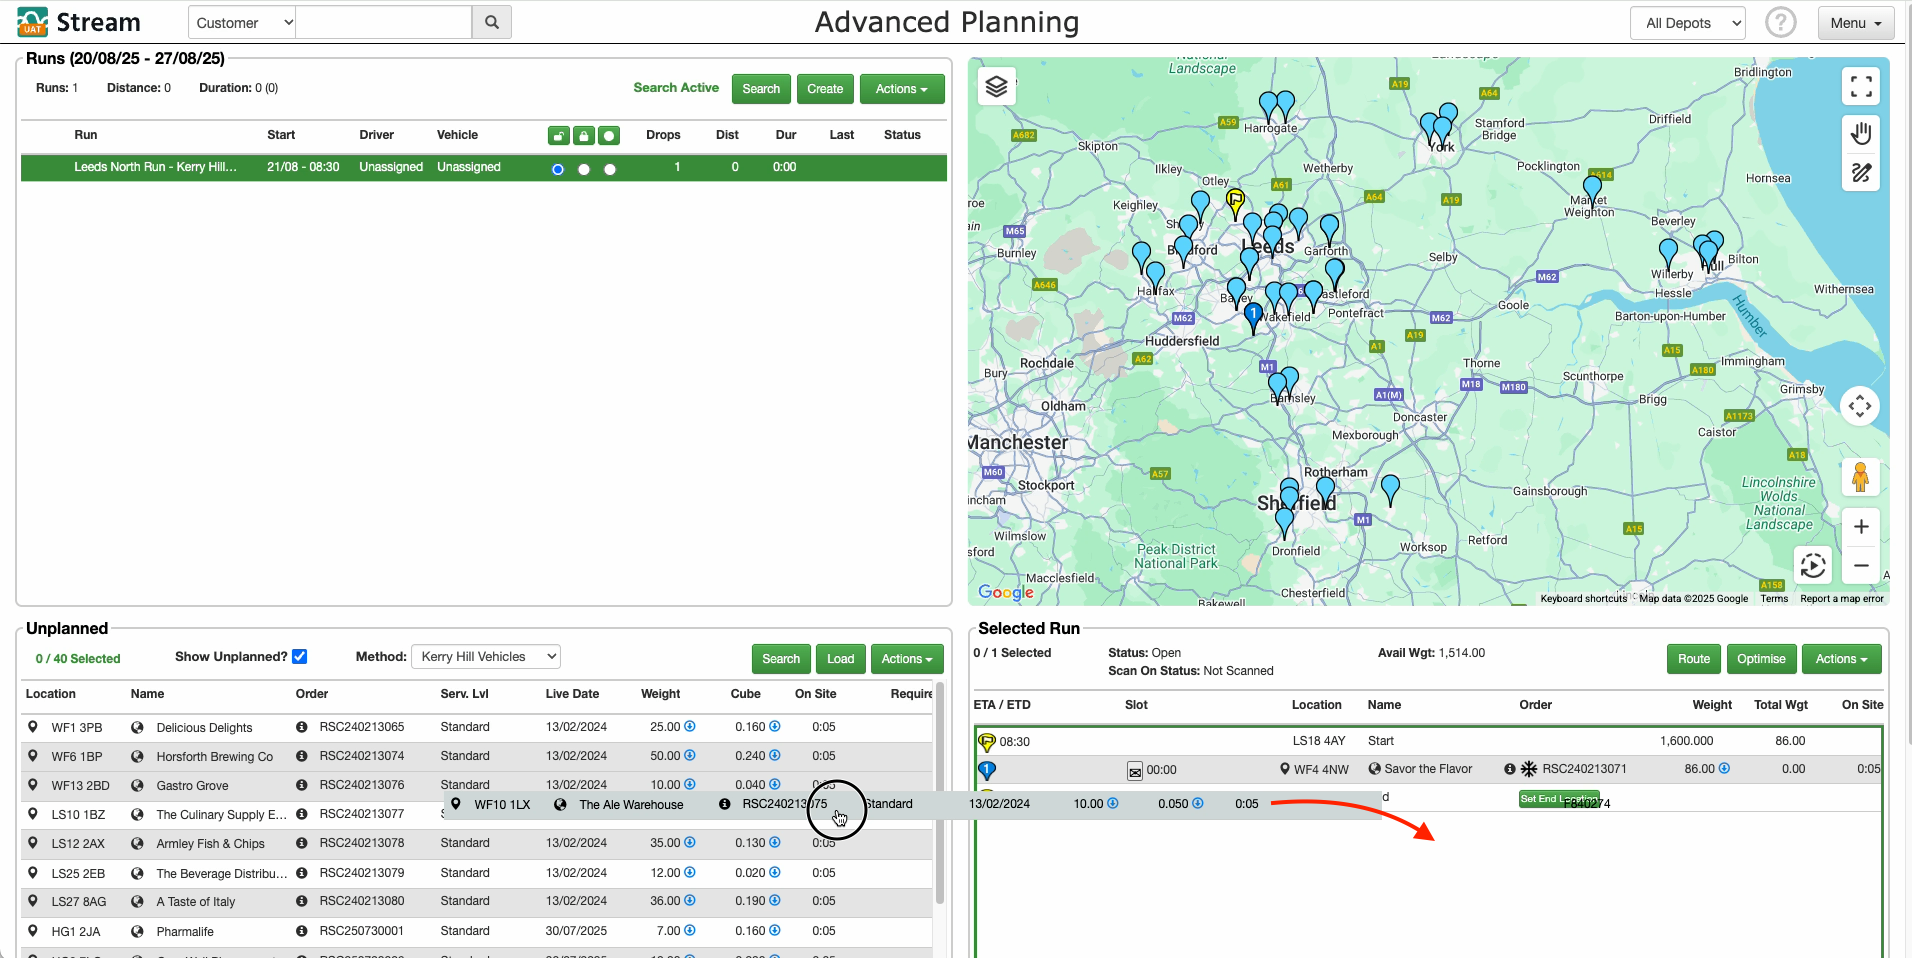
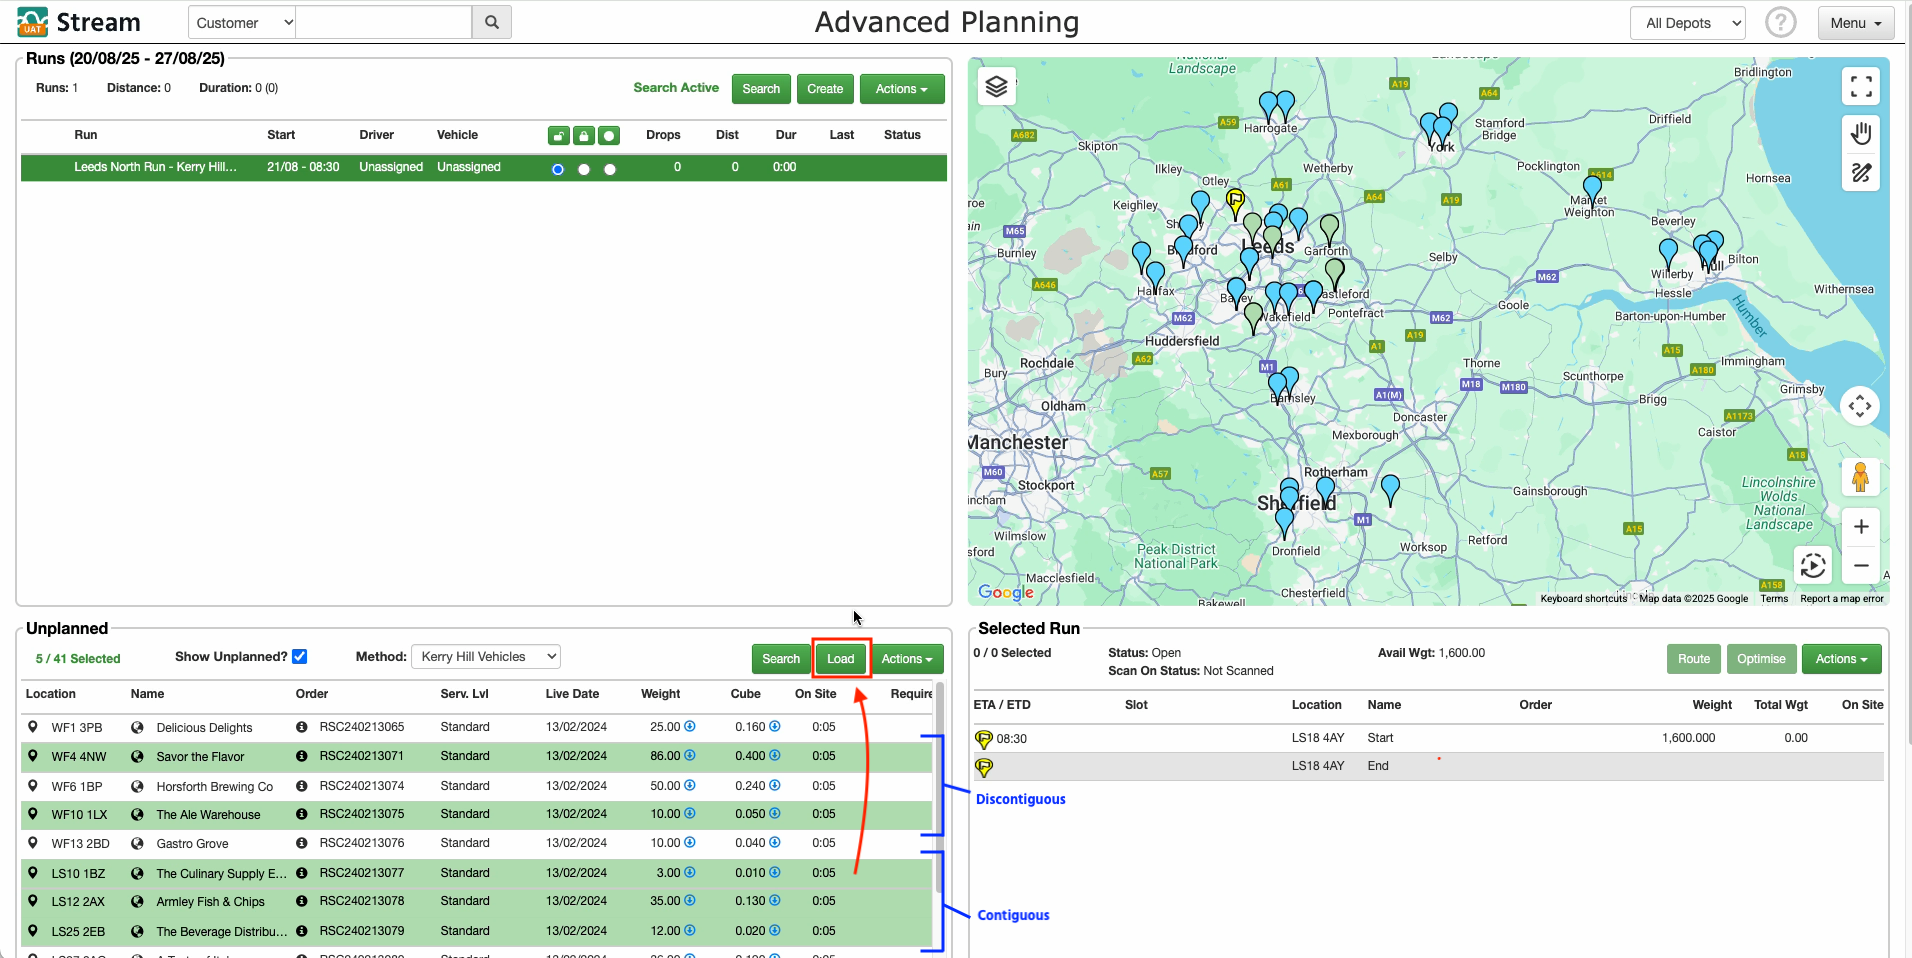
- Select single/multiple orders in the ‘Unplanned’ section and then click ‘Load’. You can mutii select orders using Ctrl + Click (Windows), or Command + Click (Mac), to select discontiguous items, or Shift + Click (Windows/Mac) to select a range of contiguous items.
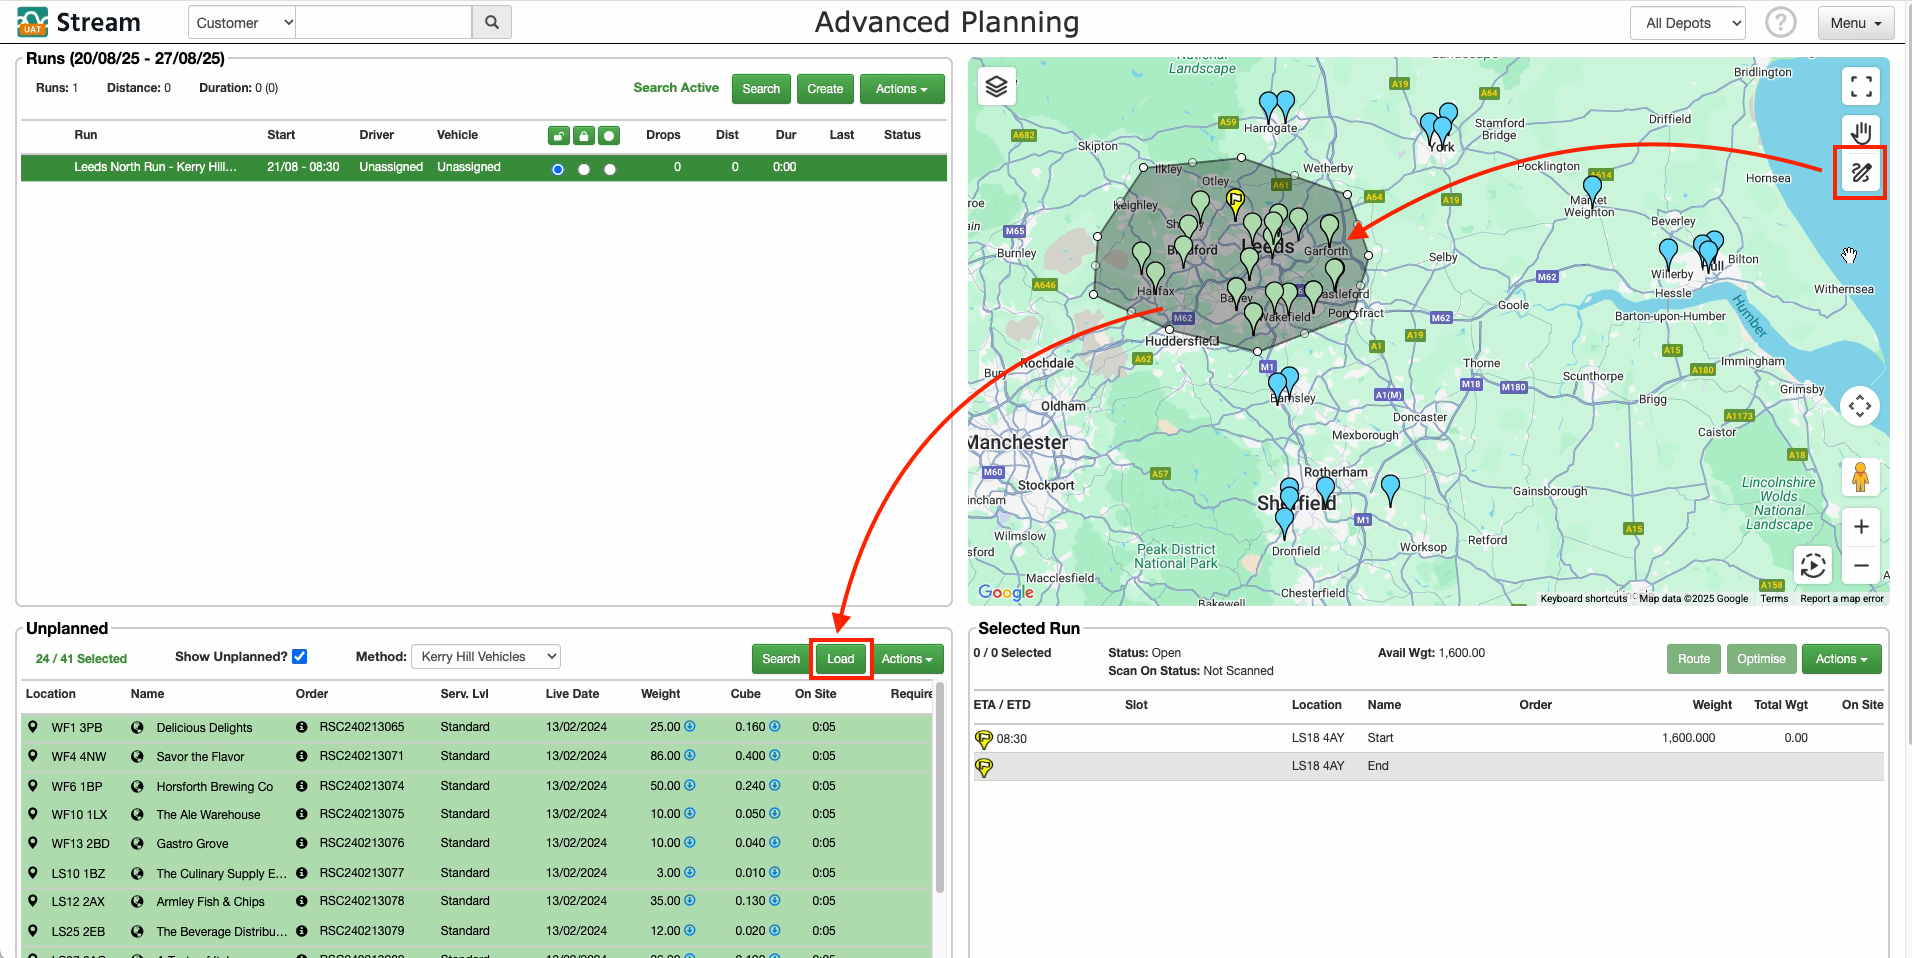
- Click the ‘Draw’ tool to create a box around the orders on the map that you wish to load onto the run. Once the orders are selected, click ‘Load’ in the ‘Unplanned’ section.
- Click and drag a single order from the ‘Unplanned’ section into the ‘Selected Run’ section
- With your orders now loaded onto the run, you need to choose how to sequence them. You have two options here:
- Click ‘Optimise’, which will order the stops into the most efficient sequence and then calculate and display their estimated time of arrival (ETA) and estimated time of delivery (ETD)
- Manually drag and drop the stops into the desired order and then click ‘Route’. This will calculate and display the ETAs and ETDs based on the sequence that you have manually created.
- Once you have your driver and vehicle assigned, and loaded your orders onto the run, is to close the run to make it available to the driver.
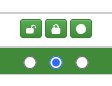
You can do this using the ‘Open’, ‘Locked’ and ‘Closed’ toggles.- Open – The run is editable and not visible to the driver in the mobile app.
- Locked – The run remains editable and is not visible to the driver in the mobile app, but is prevented from being deleted by any actions that will clear/delete any ‘Open’ runs.
- Closed – The run is editable and can now also be seen by the driver in the mobile app
Automatically plan runs
You can automatically create and assign orders to runs, including planning to your fleet based on vehicle & driver availability. For help with this, check out our guide on Autoplanning runs.
Automatically allocate orders to runs
You can use specific criteria to automatically allocate orders to runs when they are confirmed in Stream. For help with this, check out our guide on Auto allocating orders to runs.
Creating ‘Shell Runs’
Shell Runs are a way for you to create ‘ready to fill’ routes, for a set of vehicles and their drivers, depending on availability. For help with this, check out our guide on Creating ‘Shell Runs’.
Deleting a run
To delete a run:
- In the ‘Runs’ list, select the run you wish to delete
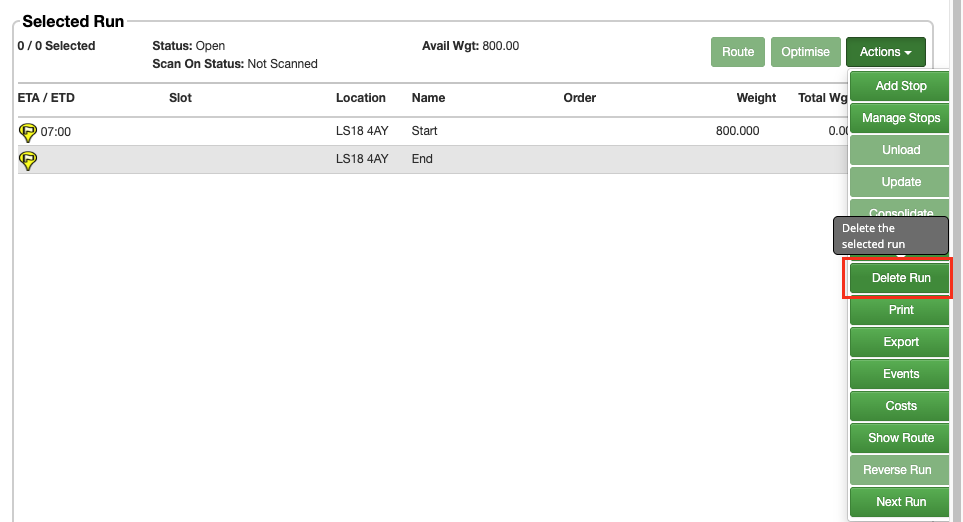
- In the ‘Selected Run’ section, click the ‘Actions’ button
- Click ‘Delete Run’
- If you have any orders added to the run you are deleting, you will be asked ‘Are you sure you want to remove all these orders from this run?’. Click ‘Yes’ to confirm deletion of the run. All of the orders planned on the run will be moved back into the ‘Unplanned’ section of the planning screen.