Adding all of your vehicle bookings is great, but what happens once that date arrives? How do you complete vehicle bookings in Stream?
Step 1: Go to ‘Vehicle Details’
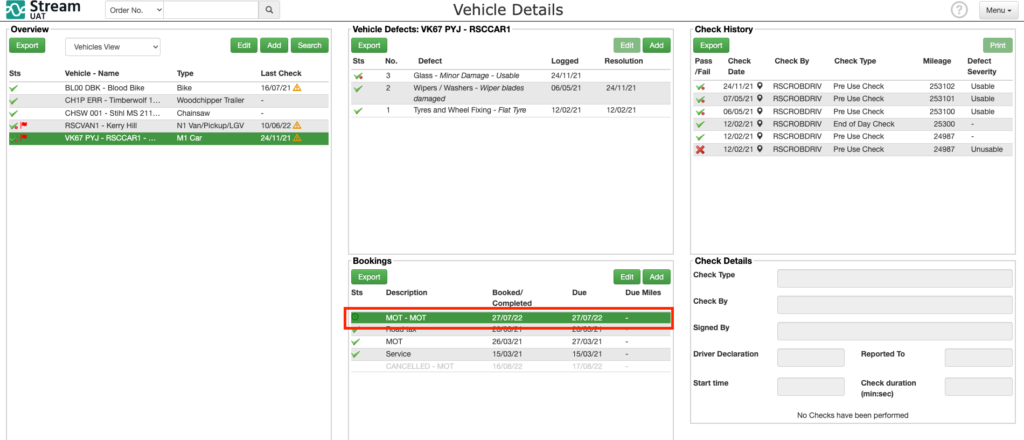
This first thing to do is head to the ‘Vehicle Details’ screen from the main menu in the top right hand corner of Stream.
Step 2: Select the booking
There are a couple of ways you can select the booking that you need to complete:
- Select the relevant vehicle from the ‘Vehicles View’ in the ‘Overview’ module on the left hand side, then select the booking from the ‘Bookings’ module in the central column OR
- Click the ‘Vehicles View’ dropdown menu and select either ‘Bookings View’ or ‘Bookings Calendar’ to see your most recent bookings, and select the booking from there
Either way, you’ll still end up with the relevant booking selected in the ‘Bookings’ module in the middle column.

Step 3: Click Edit
With the booking you want to edit selected, click ‘Edit

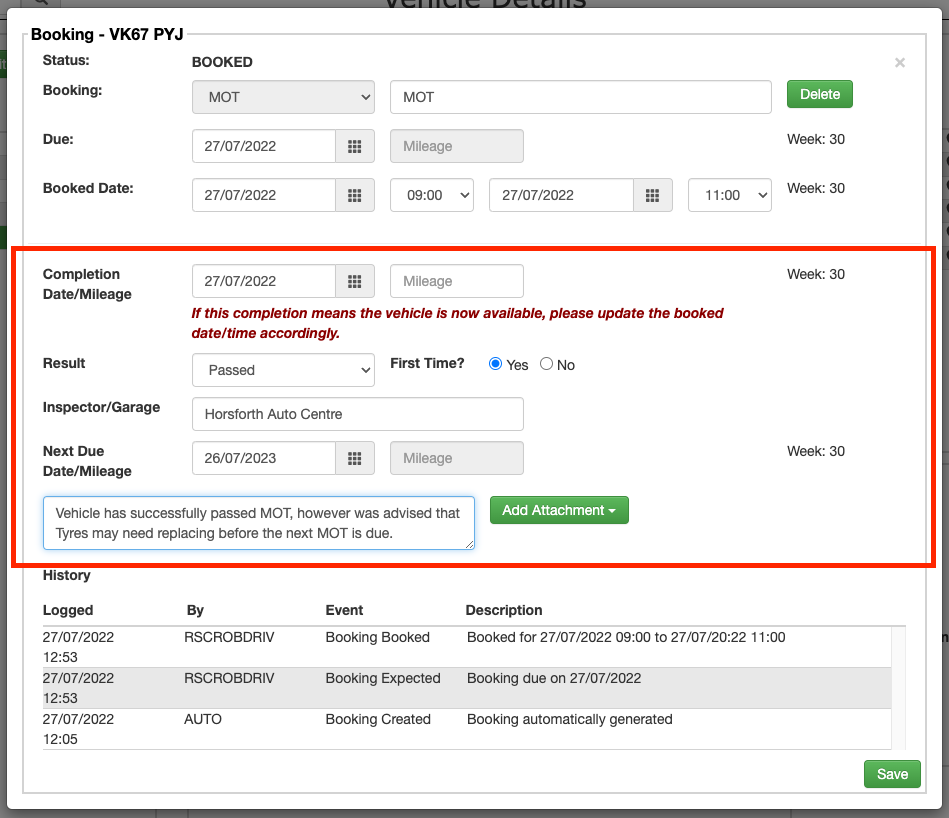
This will open the booking information screen
Step 4: Fill out the completed booking information
In the popup window, fill out the information relating to the completion of this booking, including:
- Completion Date/Mileage
- Result
- Inspector/Garage
- Next Due Date/Mileage
- Additional Notes
- Any attachments
(These fields may vary dependent on the type of booking that has been completed.)

As you can see from this one, because the MOT is set as a recurring booking, it has automatically populated the Next Due Date field, which will automatically create the next booking once this one has been saved.
Step 5: Save the completed booking
Now that you’ve added all the information to complete this booking, go ahead and click ‘Save’.
In the above screenshot, we haven’t entered the mileage information at the point this booking was completed, so Stream will prompt us to do that when we click ‘Save’.

Booking history automatically updated
If we go back into the booking, we can see that the booking history has been automatically updated with the relevant details.

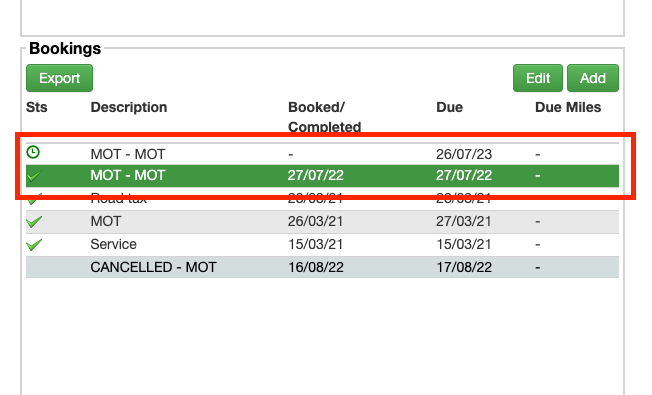
New booking automatically created
Because this particular booking was for an MOT, we can see that when we’ve saved the booking, it has automatically created a new MOT booking with the date the new MOT is due.
