You can use auto allocation to speed up the route planning process, by automatically allocating confirmed orders to runs based on predefined parameters.
This guide details how to enable auto allocation, how to set up rules for auto allocation, and provides an example workflow of using auto allocation.
How to enable Auto Allocation
To enable Auto Allocation:
- Click ‘Settings’ in the main menu.
- Click the ‘Planning’ tab on the ‘Settings’ screen
- Scroll down to ‘Auto Allocation’
- Check the ‘Enable Auto Allocation’ checkbox
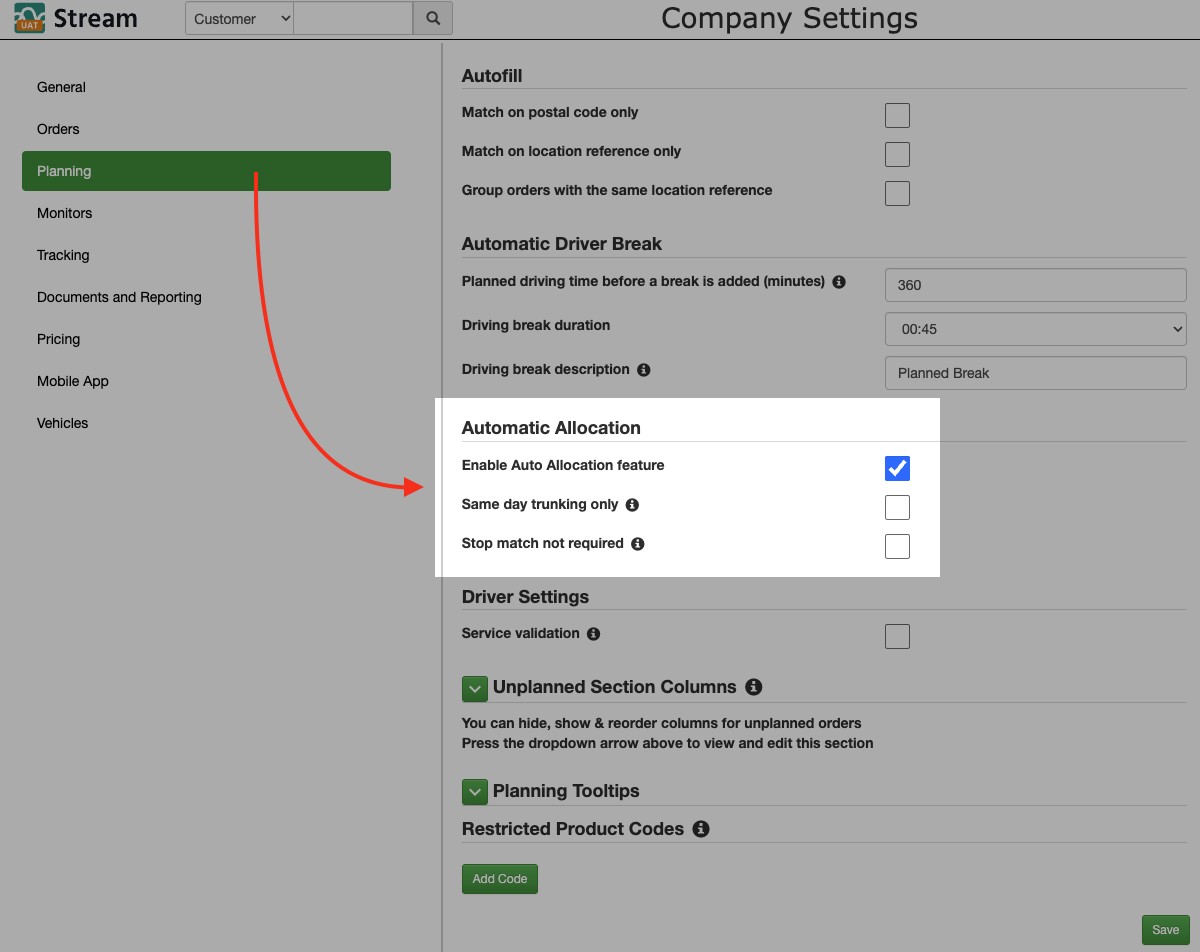
- Choose whether to enable ‘Same day trunking only’
- Allocates the order to a run ONLY if there is a Trunk run with an end date that matches the delivery run start date. If a suitable trunk run isn’t found, the order will not be allocated automatically and must instead be planned manually. Leave unchecked if you don’t require same day trunking for auto allocation. Requires you to have ‘Trunk’ set as the Delivery Method Type
- Choose whether to enable ‘Stop match not required’
- Checking this box will mean that the order can be allocated to a run when there is no matching stop found. This will essentially just use the ‘Run Matching rule’, and ignore the ‘Stop Matching’ rules selected in the next stage. Leave unchecked if you require stop matching to be used.
- Scroll to the bottom and click ‘Save’ to save the changes
Setting up your Auto Allocation rules
Once Auto-Allocation is enabled, you will need to set up auto allocation rules for the relevant delivery methods at each of your depots:
- Click ‘Depots’ in the main menu
- Click the depot you wish to update the delivery method for
- Click on the relevant delivery method you want to add auto allocation rules to
- Click ‘Edit’
- In the popup window, you will now see that ‘Auto Allocation Rules’ are available at the bottom
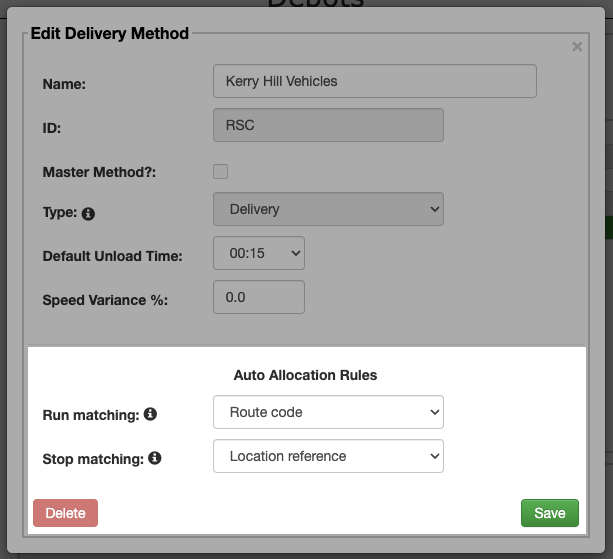
- Select the ‘Run Matching’ and ‘Stop Matching’ rules to use. These rules control how a run is found for order allocation, and how stop matching is performed:
- For Run Matching:
- Postal Code – allocates an order to a run based on the run containing a stop with a postal code that matches the one on the order. Selecting this will lock the ‘Stop Matching’ field to ‘Postal Code’
- Route Code – allocates an order to a run based on the ‘Route Info’ field on the order, matching the ‘Run Description’ of the run
- For Stop Matching:
- Postal Code – allocates the order to the run containing the matching postcode and sequences it next to matched stop
- Location Reference – allocates the order to the run containing orders with matching information in the ‘Location Reference’ field within the location address and sequences it next to matched stop
- For Run Matching:
- With your matching rules selected, click ‘Save’
Now, every time an order is confirmed for that Delivery Method, an attempt will be made to automatically allocate that order to the most appropriate run.
If you are using master runs with planned stops, you can use either the delivery postcode or the location reference to match an order to a specific slot within the run.
Auto Allocation example workflow
Let’s run through an example of the steps in the auto allocation process, to demonstrate how it works.
In this example, we will be using ‘Run Matching: Route Code’ and ‘ Stop Matching: Postal Code’. We have also enabled the option on the Auto Allocation settings for ‘Stop match not required’, so that the orders will be added to the matching run, even if there isn’t a matching postcode on it already.
- Create the runs that you want your orders to be automatically assigned to.
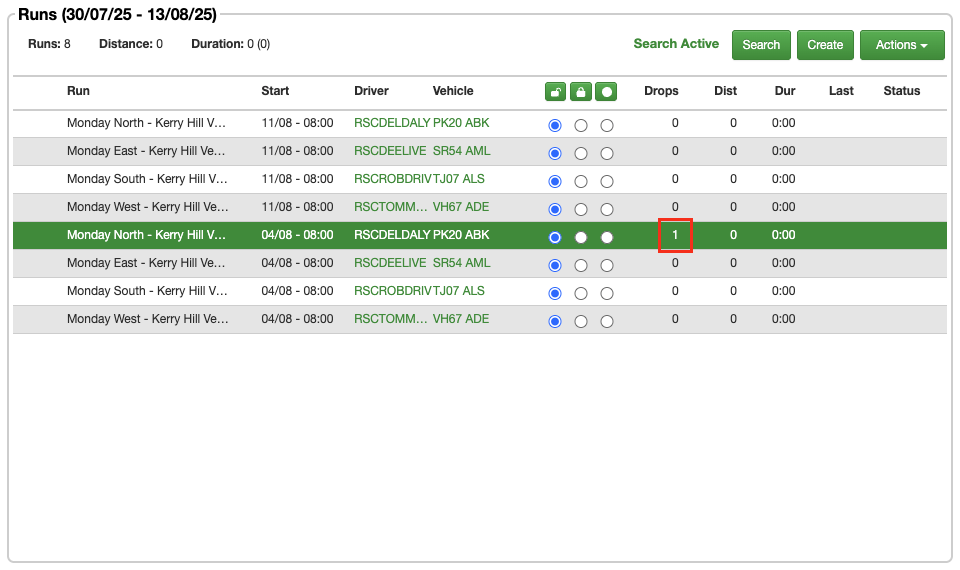
In this example we’re naming ours by [DAY] [LOCATION] (eg Monday North) so we can use the ‘Route Info’ field on the order to allocate these correctly. I have added two separate sets of the same run names on separate dates to demonstrate that it will add it to the next available matched run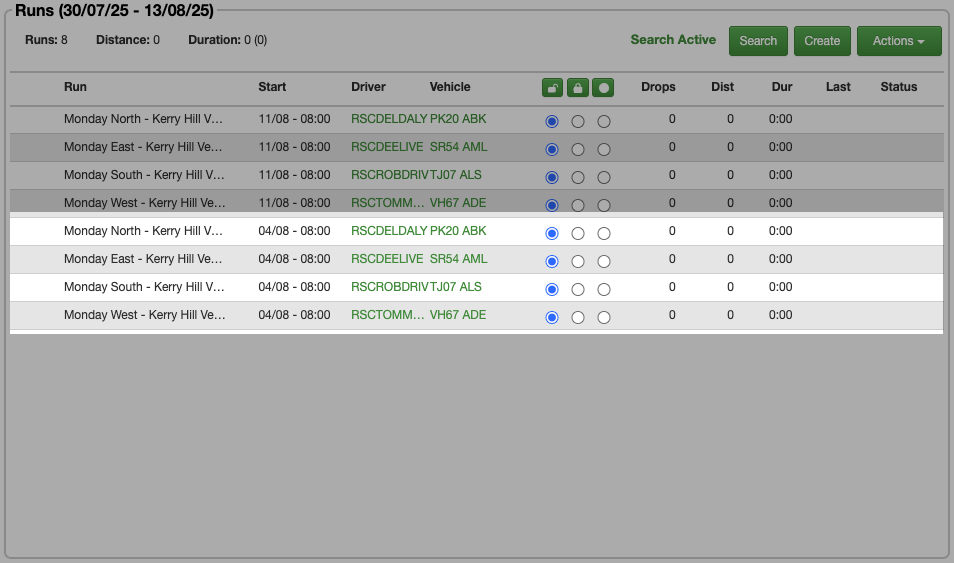
- Create the order and add the required route code into the ‘Route Info’ field on the order details. In this example we will add ‘Monday North’ as that is the Run Description that we want to automatically allocate the order to
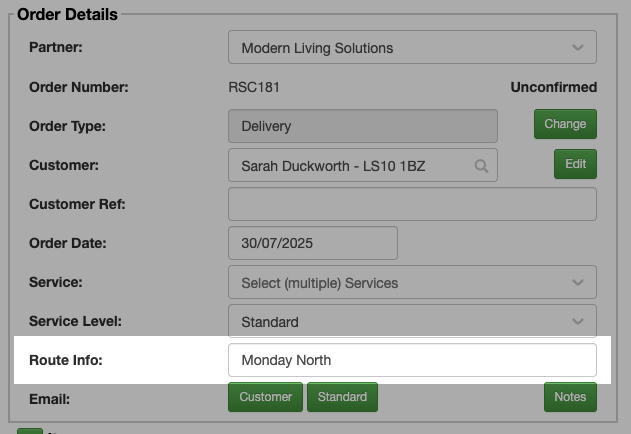
- Ensure the order has a Delivery with a ‘Delivery Method’, ‘Stock Location’ and ‘Oh Hand Date’ selected
- Click ‘Confirm’ to confirm the order
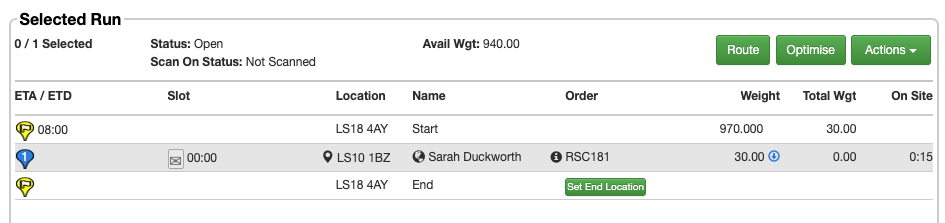
- Once the order has been confirmed, you can see that it has been automatically allocated to the run we identified using the ‘Route Code’ in the ‘Route Info’ field
- Additionally, if we now upload a CSV of orders into Stream using the same matching criteria (‘Monday North’ in the ‘Route Info’ column of our upload file), it will automatically add those Orders to the relevant runs when we confirm them.

- As you can see it has added our orders to the next upcoming runs with the matching criteria, and ignored the runs created for a later date