In Stream you can create both custom check types (checklists), and custom checks (individual checklist items).
This is incredibly useful if you perform walkaround checks that have different requirements from the default ones we provide, or if you have vehicles that require their own unique set of checks.
Creating a custom check type
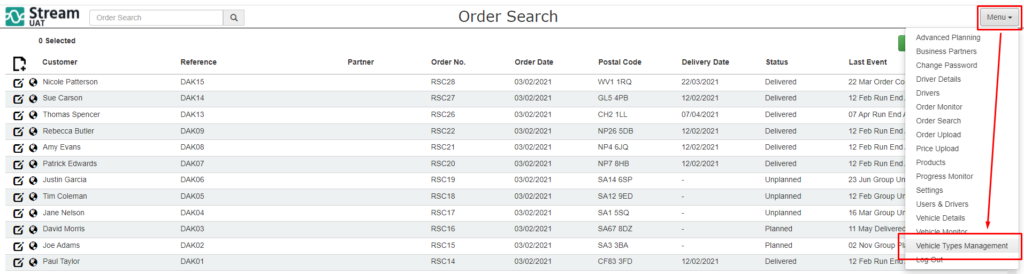
Step 1: Go to ‘Vehicle Types’
Go to the ‘Vehicle Types’ page in Stream (accessed through the main menu in the top right hand corner).
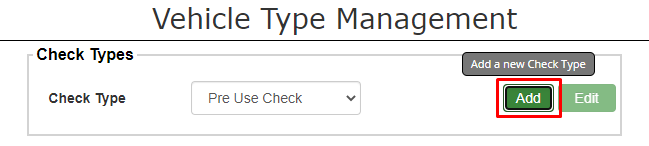
Step 2: Add a new ‘check type’
In the middle column under ‘Check Types’ click ‘Add’.
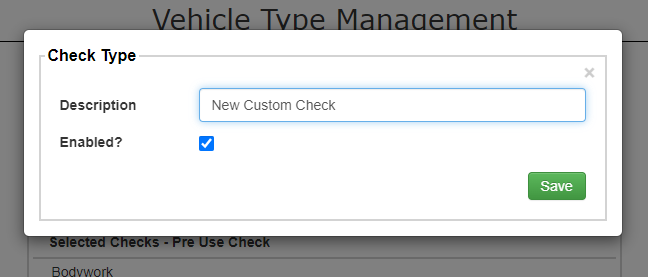
Add the name for this check type in the ‘Description’ field and then choose whether you want it to be enabled or not.
It might make sense to disable the check until you have finished configuring it, otherwise it will become immediately available in the Stream Mobile App for drivers.
Click ‘Save’.
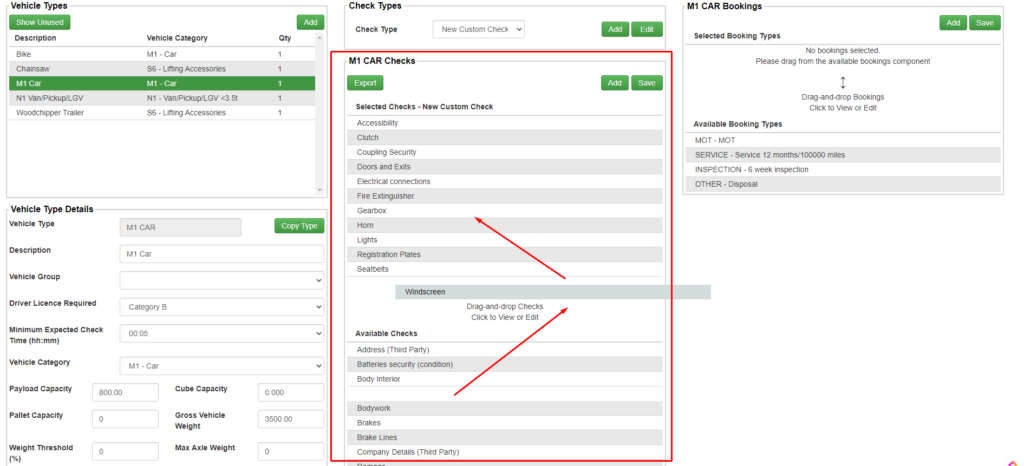
Step 3: Select the vehicle you want to use this type of check
In the ‘Overview’ module on the left of the screen, select the vehicle that you want this check type to be used for and then in the ‘Check Types’ module, select the new check type that you have just created from the dropdown list.

Step 4: Add the individual checks to the check type/checklist
In the central column, you can now move individual checks onto into this check type by using the drag and drop functionality.
In the example below, we’ve added the checks in alphabetical order, but you can use the drag and drop to place the checks in the order you would like your drivers to complete them in as this list order is reflected inside the Stream Mobile App.
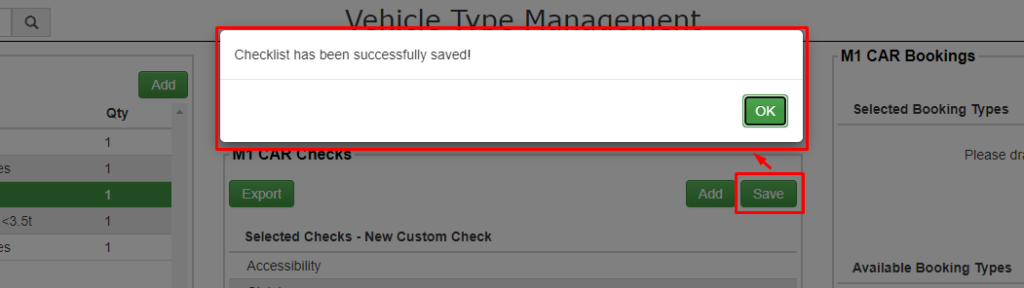
Step 5: Click save
Once you have finished adding all of the relevant checks to the check type/list, you can go ahead and click ‘Save’.
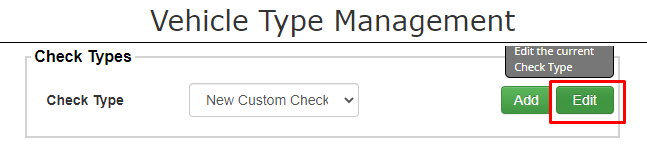
If you chose not to enable the check type earlier, you can click ‘Edit’ in the Check Types module and enable the check type.
This will make the check type now available for drivers to select in the Stream Mobile App and perform on their vehicles.
Editing the checks
If at any point you need to add/remove checks from this check type, simply select the check type from the drop down menu and drag and drop the relevant checks onto, or off, the checklist. Don’t forget to press ‘Save’ once you’ve finished making your changes!
Deleting or Disabling the Check Type
If you want to disable or delete the check type, simply select the check type from the drop down menu and then press ‘Edit’ in the Check Types module. Here you can untick the ‘Enabled’ option or delete the check type.
Creating a custom check
Please Note:
Once you create a new individual check, it will become available to be added to any of your check types/lists, so at this point in time it doesn’t matter which vehicle you have selected.
Step 1: Go to ‘Vehicle Types’
Click the main menu in the top right corner of Stream and go to ‘Vehicle Types’.

Step 2: Add a new check
In the central column under ‘Checks’, click ‘Add’.
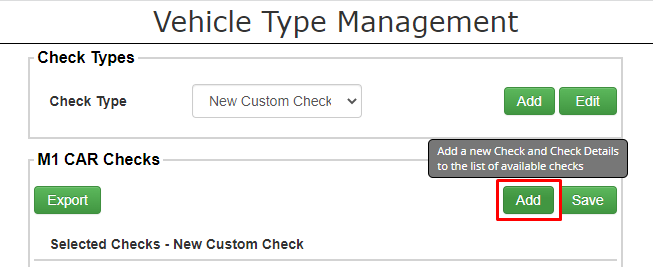
This will open the check creation input window.
Step 3: Name your check
In the check creation input window, give your check a name and a description that can be clearly understood, as these are what will be displayed on the checks for Drivers inside the Stream Mobile App when they’re performing the checks.
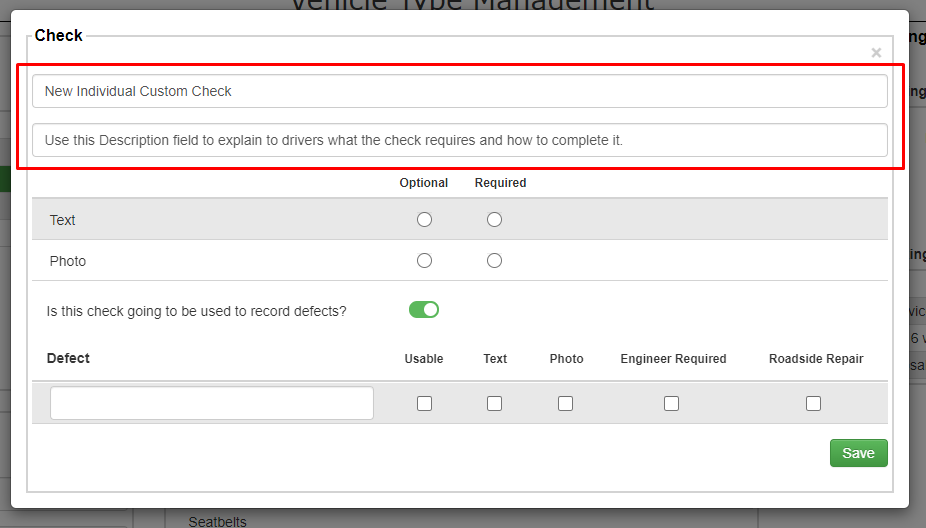
Step 4: Add what’s required when performing the check
The next section determines whether additional notes/text and a photo are required to be captured regardless of whether the check is passed successfully or a defect is reported.
Make a selection for each as to whether they are ‘optional’ or ‘required’.
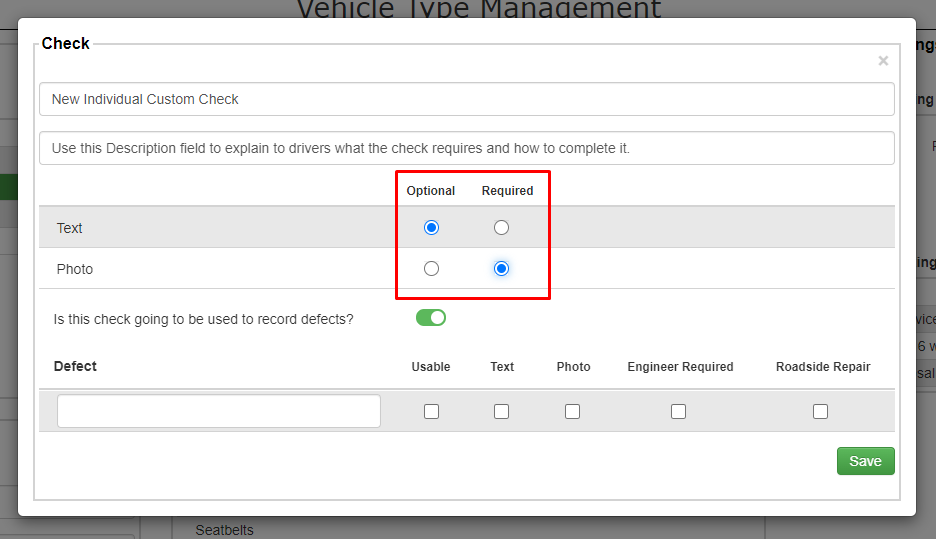
Step 5: State if this check will be used to record defects
The toggle button asks if the check is going to be used to record defects.
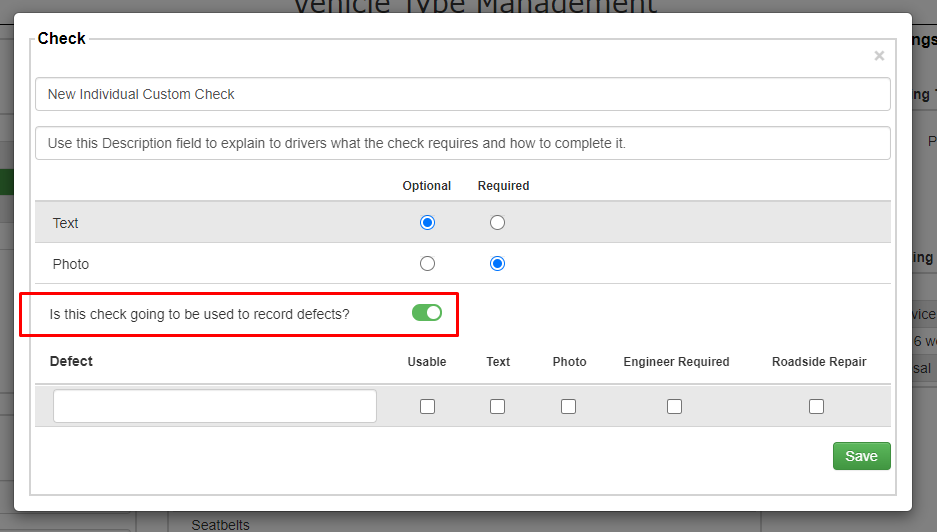
More often than not you can leave this toggle switched ‘on’.
However, if you wanted a check that isn’t in relation to the usability of the vehicle, for example you want a driver to check that they have the required PPE before visiting a particular site, then you may wish to switch this toggle to ‘off’.
If you do switch the toggle off, you will notice that the information required about a defect will be removed from this window and you can simply press save.
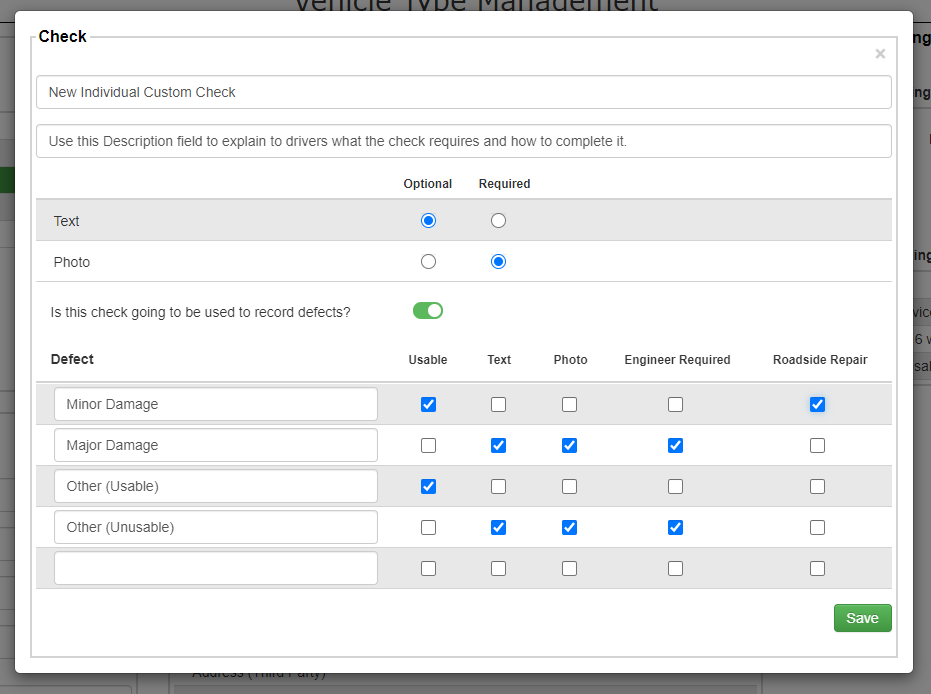
Step 6: Add Defect Status/Severity
The Defect section at the bottom is for you to provide the varying severities of defect that can be selected against this check.
These will be used to determine whether the defect will render the vehicle usable or unusable depending on which option is selected by the driver in the Stream Mobile App when performing the check.
Enter a name in the empty field for each defect status that you are going to provide as options.
Then use the relevant check boxes to decide if:
- The vehicle will still be usable if this status is selected
- Additional text information about the defect is required
- Photographic evidence of the defect is required
- This defect will require the assistance of an engineer
- The defect can be resolved with a roadside repair
Step 7: Save your new check
Once you’ve finished adding all the information for this individual custom check, go ahead and click ‘Save’.
This will add this new check to the list of available checks and you are now free to drag and drop it into any of the check types that you have in your Stream account.